Managing Users
This page contains:
You must be signed in as Administrator to manage users. To manage users, navigate to Projects Dashboard > Users.
Are you working with on multiple projects or for multiple teams? Create and manage Testers to grant a specific user permission to just the projects that they are working on.
Add New Tester
- Sign in as Administrator.
- Navigate to Projects Dashboard > Users.
- Click on the + New Tester link in the right-hand sidebar.
-
Enter in the email, password, and password confirmation for the new user you want to create.

- Confirm whether you want to assign an Author or Administrator role to the new Tester.
- Click Create User.
The new Tester will now appear on the Users page.
If you have a new subscription and you try to add more users than your subscription allows, you may see a notification that unlimited testers have been enabled, in order for your whole team to try out Dradis. Note that these additional seats beyond your subscription are temporary, and at the end of the temporary trial period, users beyond your subscriptions seat count will be disabled unless you increase the license seats on your subscription.
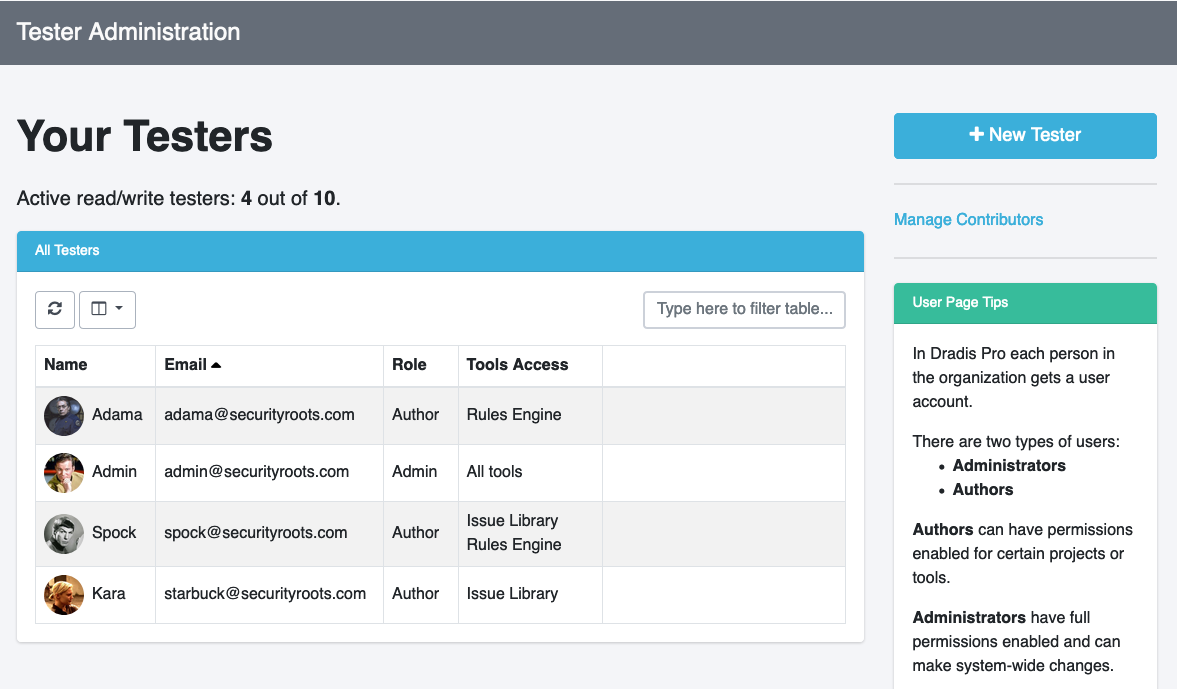
Existing Testers
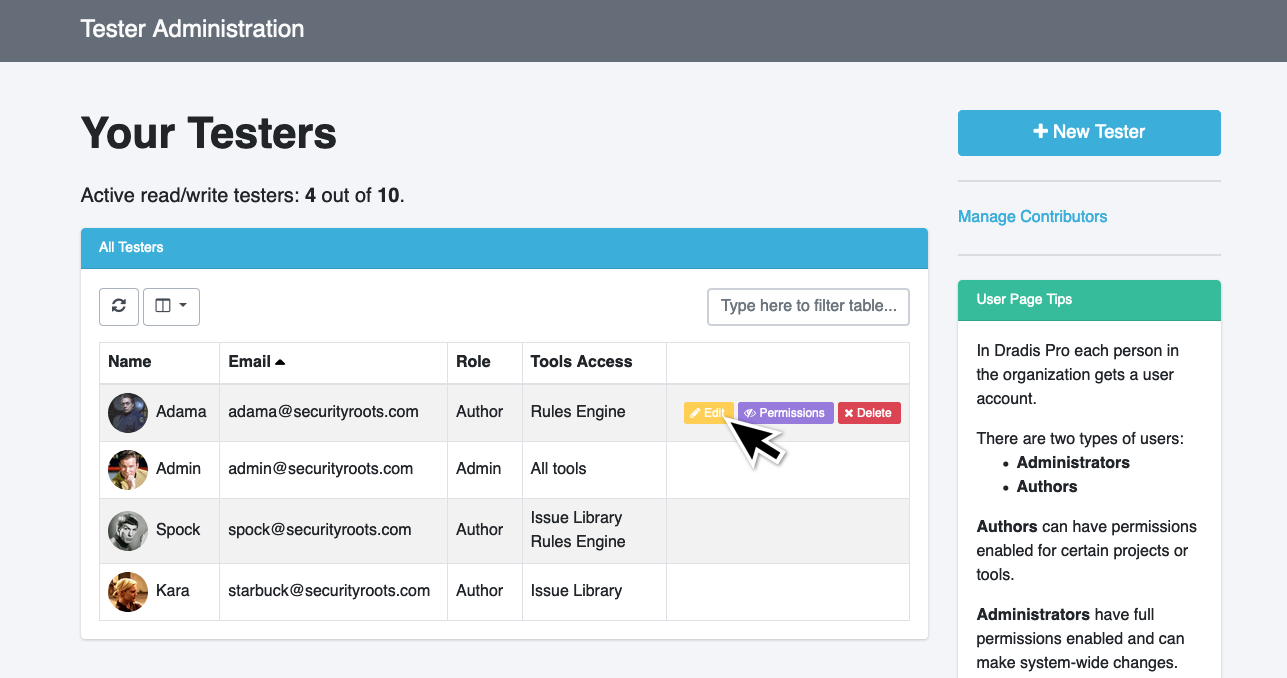
Edit a Tester
Edit the email, password, or role of any existing user.
- Sign in as Administrator.
- Navigate to Projects Dashboard > Users.
- Select the yellow Edit button below the picture of the correct user.
- Edit the email address, password, or the role of the user.
- Click Update User to save the changes
Unlock a Tester
If the tester exceeds the allowed number of maximum login attempts, their account will be locked.
To unlock the account, the account password will need to be reset. This can be done by the user themselves using the Forgot my Password! option on the Dradis login page.
This approach assumes that you have configured the mail server for Dradis. If you have not done so, an Admin can navigate to Users in the header of the Dradis app and click Unlock to unlock that tester's account.

You can reset the user's count of login attempts through the command line.
First, find the correct user ID from the URL like: /pro/admin/users/123/edit. You can see this when logged in as your other Admin user, browsing to the Users tab, and hovering over the Edit button for your locked user. Then run:
  $ cd /opt/dradispro/dradispro/current/
  $ RAILS_ENV=production bundle exec rails console
  irb> u = User.find(123)
  irb> u.unlock!
  irb> exit
Make sure to sub in the correct user ID for 123 in the example above!
Disable a Tester
When a user is disabled it will not allow them to log in or access any of the app's data. Any data created by the user will remain in the instance. Disabled users do not count toward the number of seats used by your Dradis instance.
- Sign in as Administrator.
- Navigate to Projects Dashboard > Users.
- Select the yellow Edit button below the picture of the correct user.
- Select the radio option for disabled
- Click Update User to save the changes
Tester Permissions
Authors can be given access to just the projects and tools that they need. An Author's access to any project on the instance can be granted or revoked. Only Authors assigned to a project can view it and work on it.
For more on user project permissions and teams, please check out the Teams and Permissions page of the Project guide.
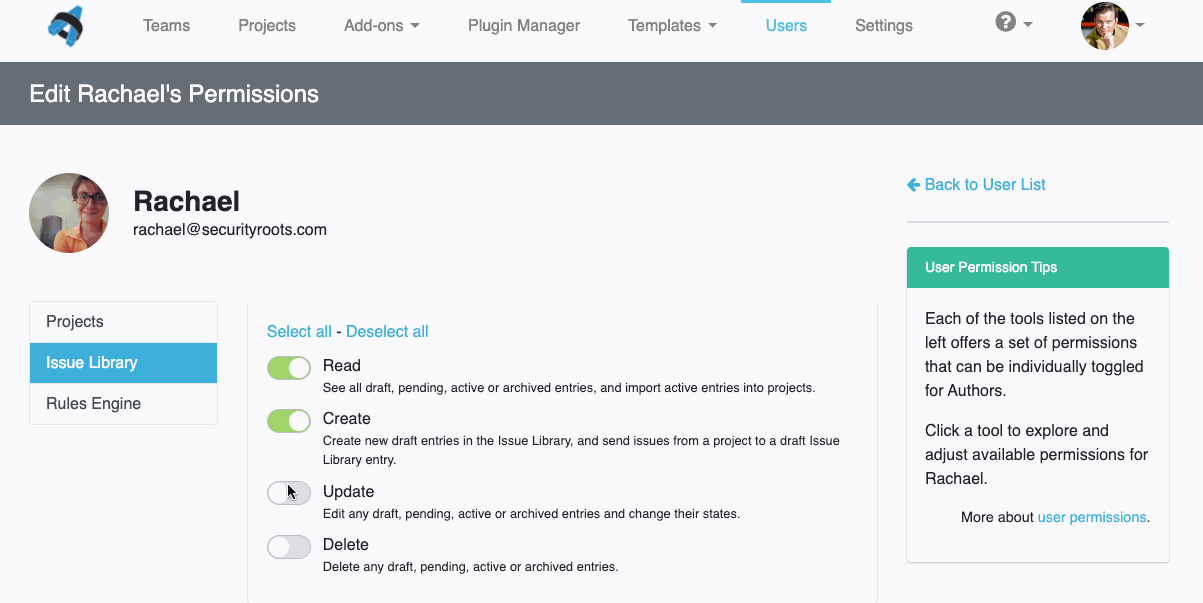
For tools like the IssueLibrary, the Rules Engine, or the Remediation Tracker, Authors can be given action-based permissions. Do you only want Author #1 to be able to Read IssueLibrary entries but not create, update, or destroy them? You can do that! Do you want Author #2 to have full control over the Rules Engine? You can do that too!
- Sign in as Administrator.
- Navigate to Projects Dashboard > Users.
- Select the purple Permissions button to the right of the correct user.
- Select the correct tab (e.g. Projects, IssueLibrary, Rules Engine, Remediation Tracker, etc)
- Toggle the switch to green next to the correct Project name or tool action to provide access.
- Optional: Click Select all or Deselect all to quickly grant or revoke access across all projects or for all actions within a tool.
- Click Save changes to save the changes before moving on or switching tabs
Next help article: Enabling / disabling sign ups →