The Report Content page
This guide contains:
- Before you begin: Setting up your Report Template Properties
- Content Blocks
- Document Properties
- Migrating an old-style Project
This guide describes the features that are available in Dradis v2.7.0 or later. If you need to upgrade, please follow the instructions on the Upgrade Dradis Pro page of the Deployment guide.
Before you begin: Set up your Report Template Properties
To start working with the Report Content page, you need to walk through the following setup steps:
-
Upload your report template if it isn't already uploaded.
-
Click the yellow Edit button below the report template, then navigate to the Content Blocks tab.
-
Define the content blocks that your report template is expecting.
-
Then, navigate to the Document properties tab.
-
Define the document properties that your report template is expecting.
-
Click the Update Report template properties button, then navigate to Projects in the header and locate the project you're working with. Click the yellow Edit button, and make sure that the project is associated with the report template in Step #1.
Content Blocks
The Content Blocks pane on the Report Content page will display the Content Blocks that you've defined in your Report template properties. If they do not appear, walk through the steps outlined above.
Note sure what Content Blocks your report template is looking for? Learn more in the Note content control page of the Custom Word reports guide.
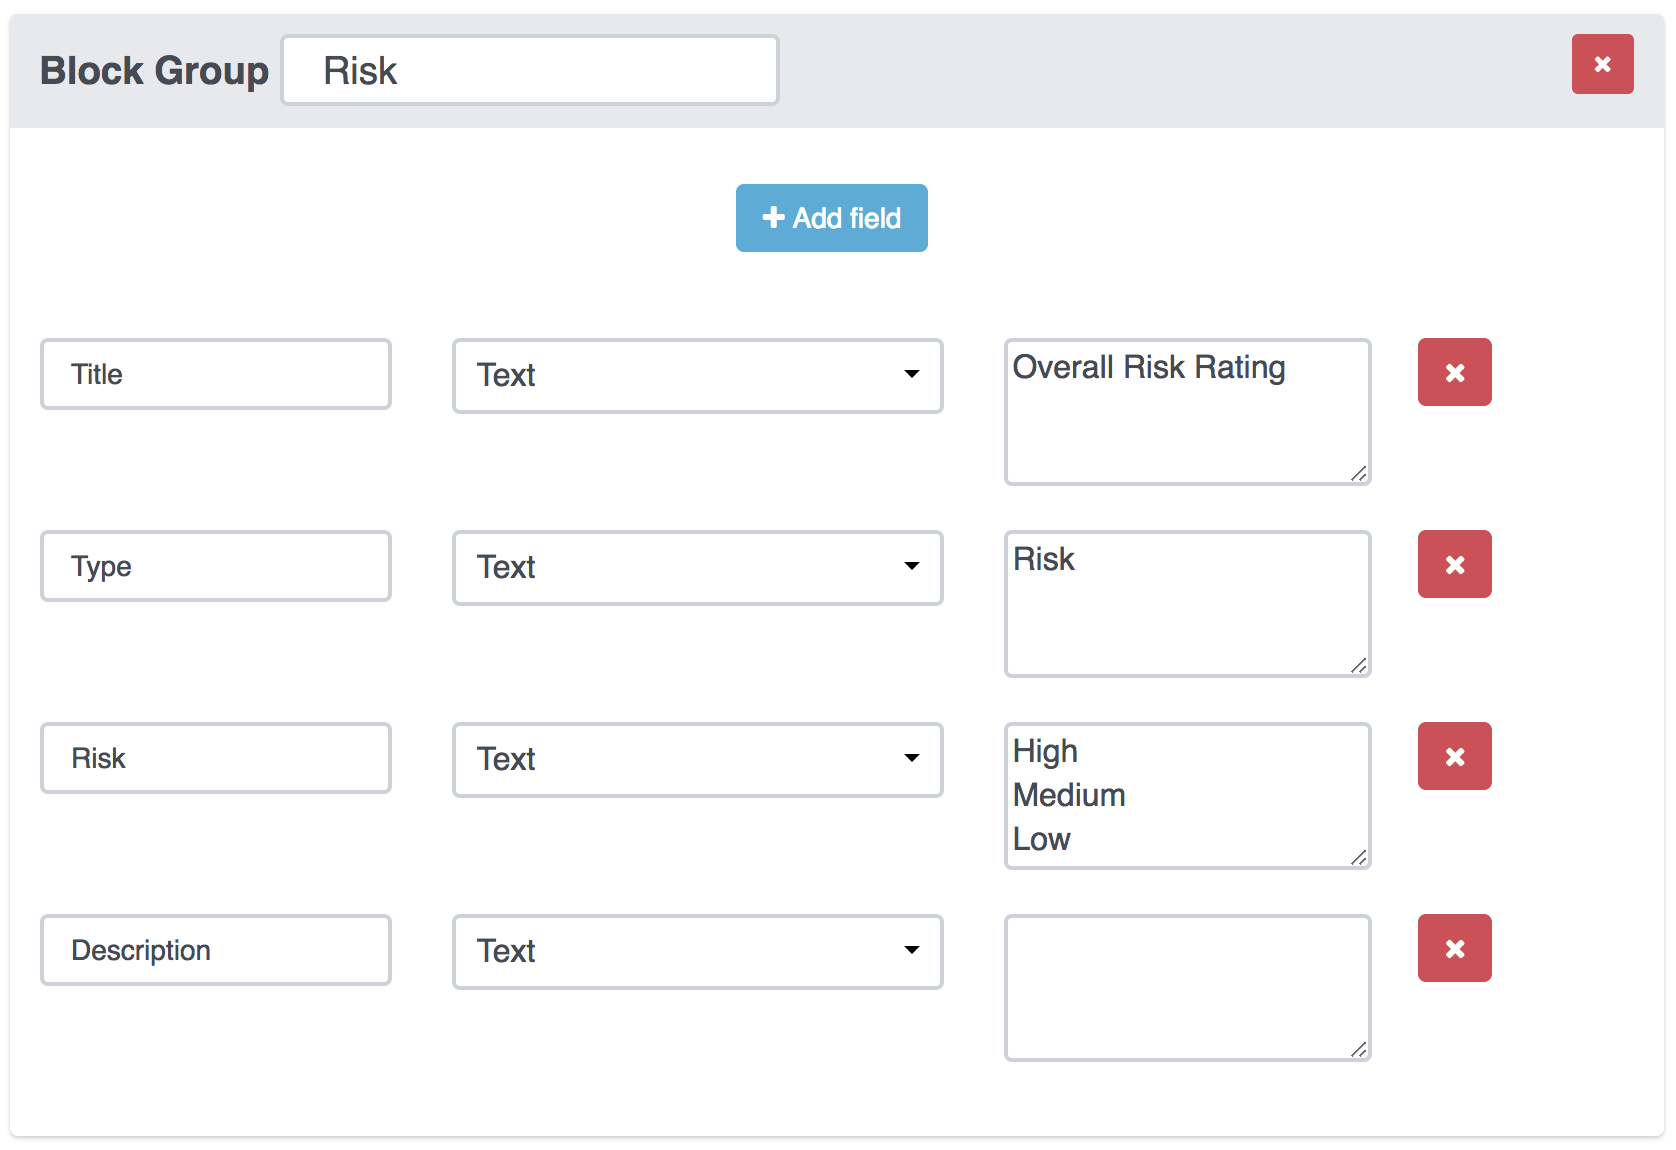
In the example below, we've defined the following Risk Block Group in our report template properties:
- Title: A Text field with the value
Overall Risk Rating - Type: A Text field with the value
Risk - Risk: A Text field with the possible values
High,Medium, orLow - Description: A free Text field
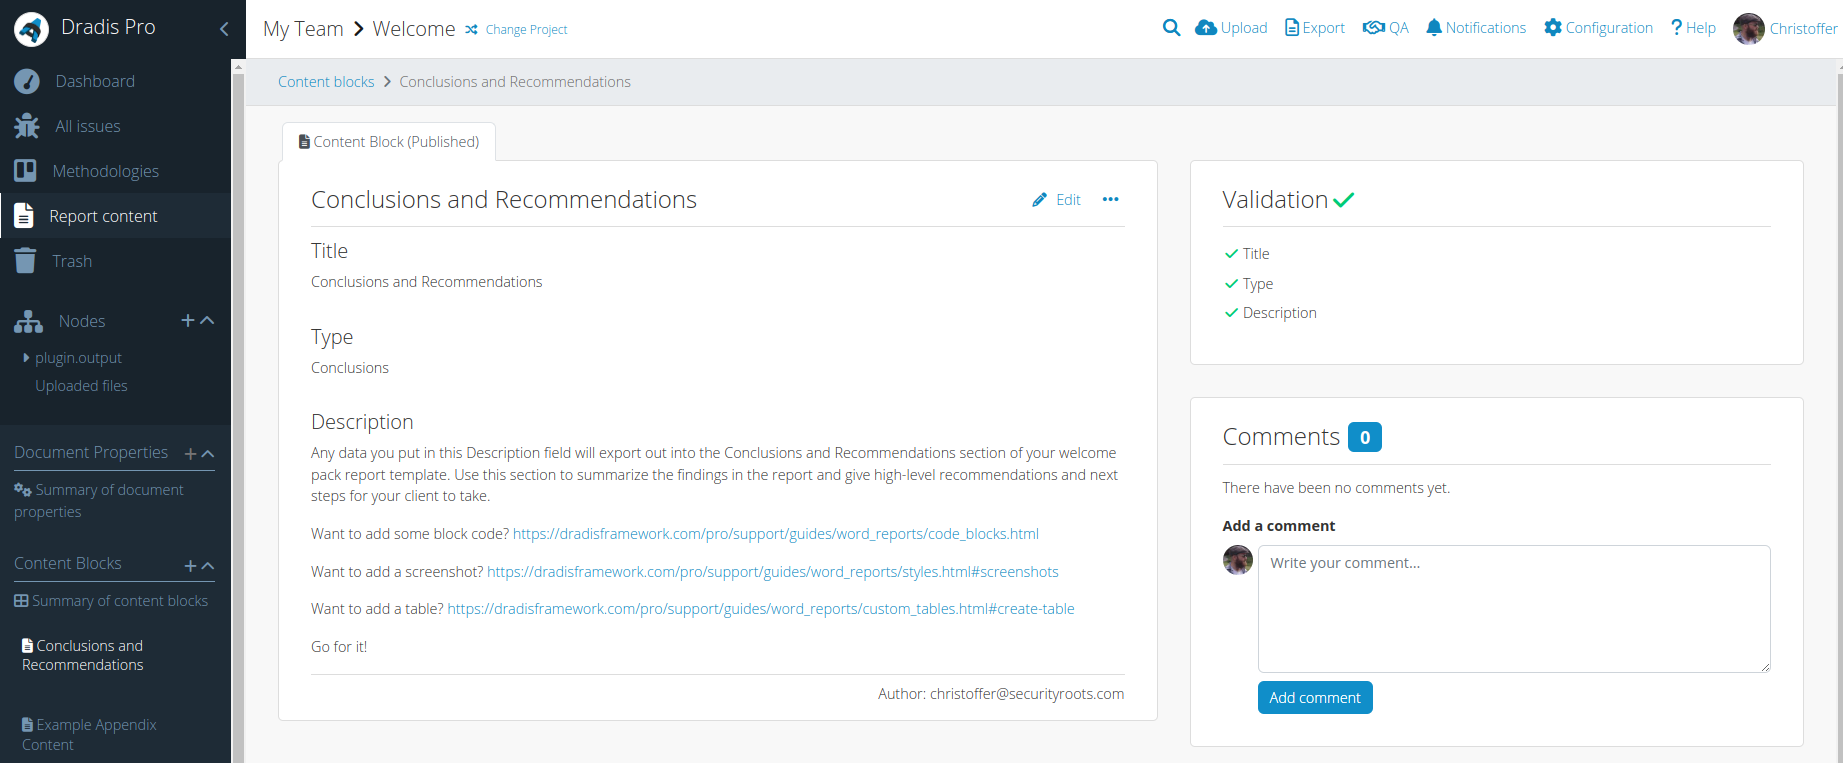
Inside the Dradis project that is associated with the report template pictured above, our Report Content page's Content Blocks section looks like this:
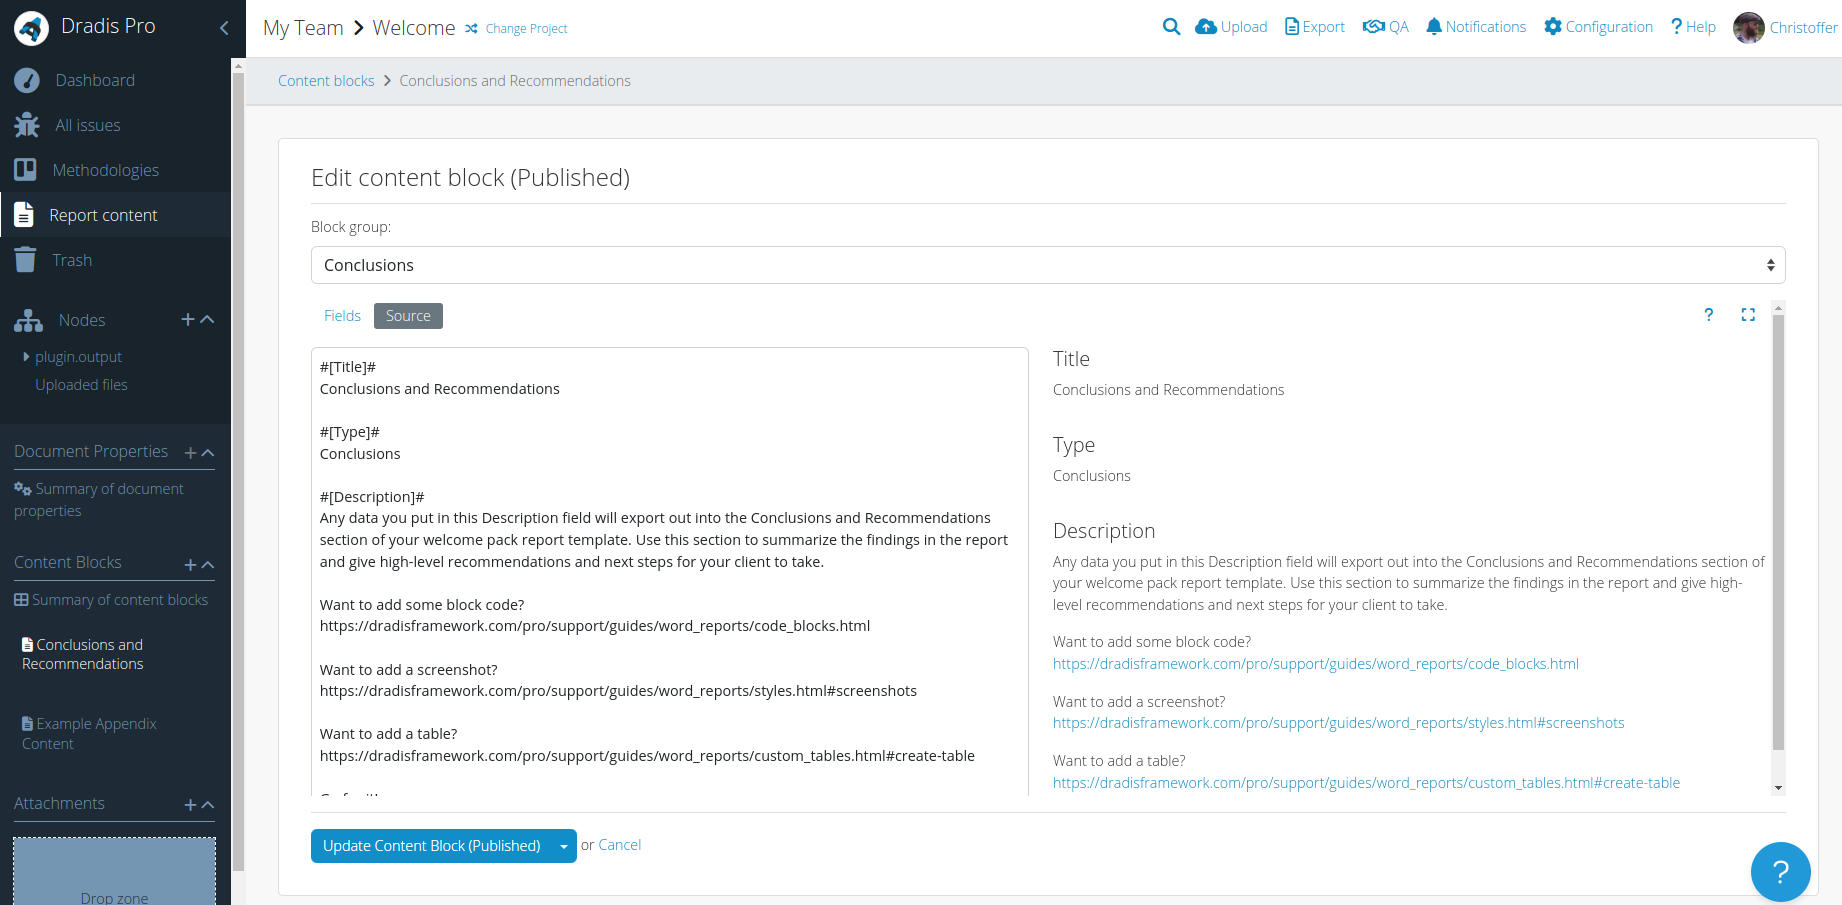
To customize the data that will populate the ContentBlock content controls in your custom report template, just click Edit and fill in the fields with your project-specific content:
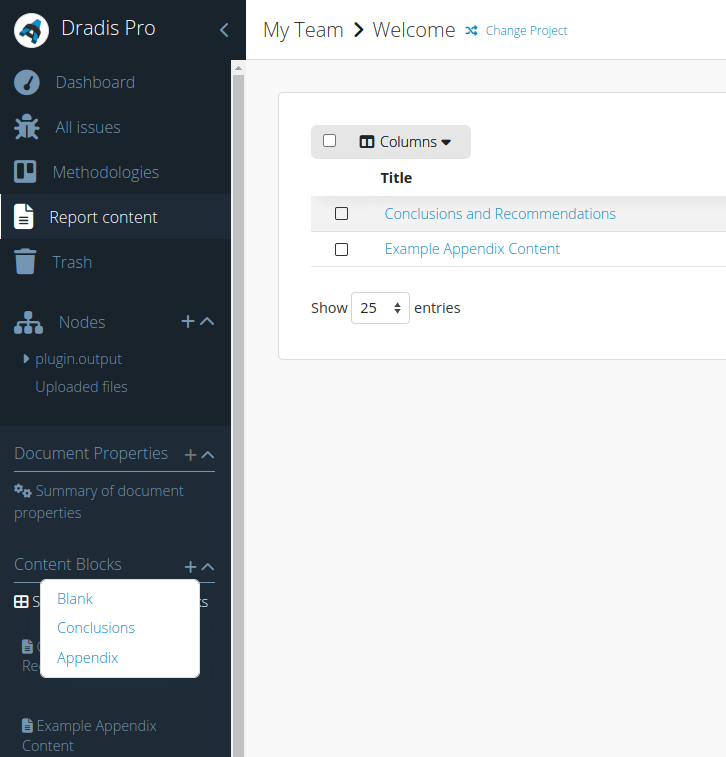
You may also manually add new Content Blocks within the Project even if that Content Block is not defined in your report template properties, or if you are working in a project not associated with a report template. Click on the + icon on the sidebar to add a Content Block.
Document Properties
The Document Properties pane on the Report Content page in your Project will display the Document properties that you've defined in your Report template properties. If they do not appear, walk through the steps outlined above.
Not sure what document properties your report template is looking for? Learn more in the Adding document properties page of the Custom Word reports guide.
In the example below, we've defined 3 document properties in our report template properties:
dradis.clientdradis.titledradis.version
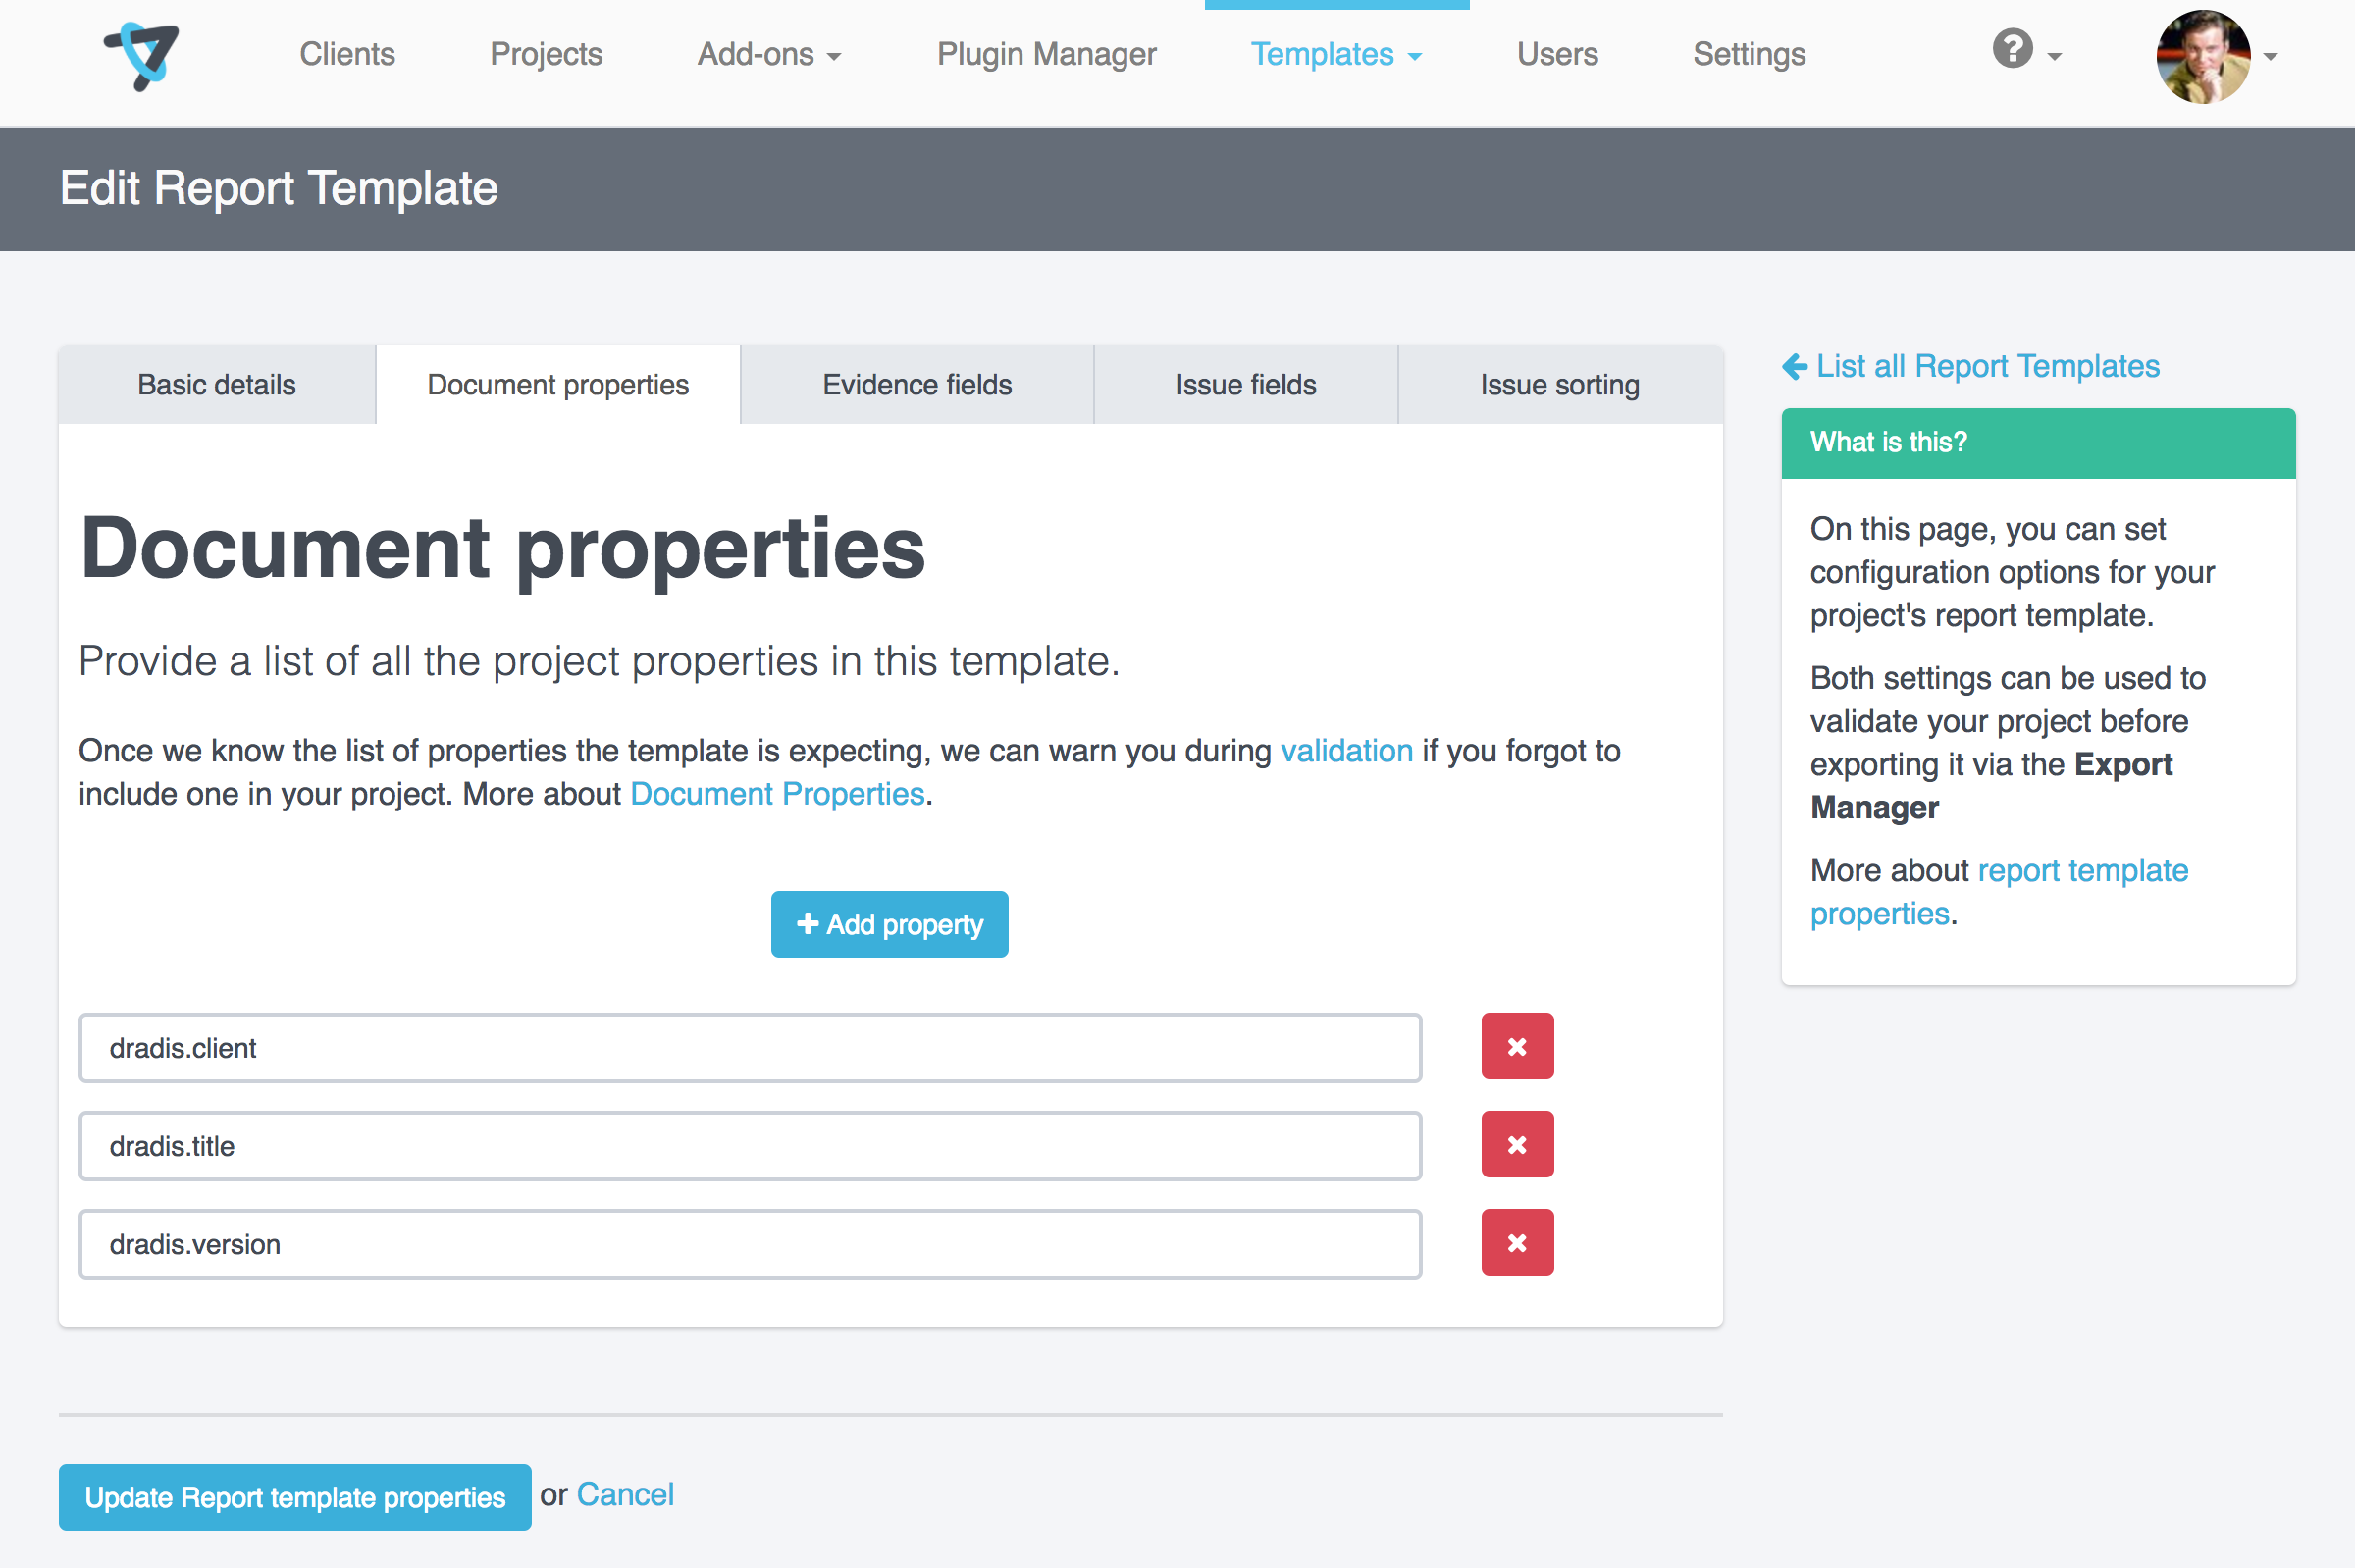
Inside the Dradis project that is associated with the report template pictured above, our Report content page looks like this:
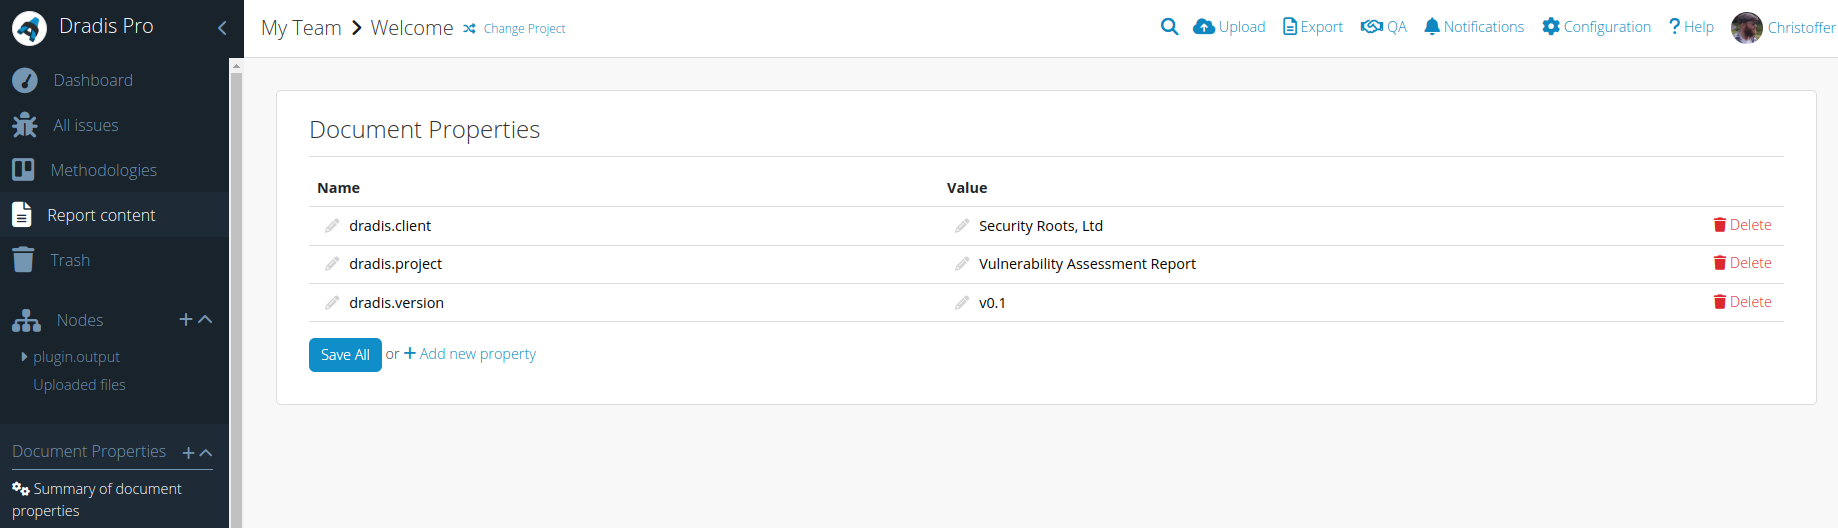
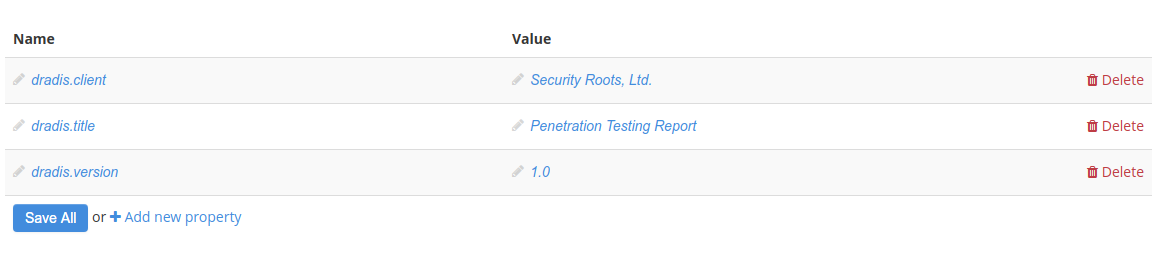
To define the Document properties so that they populate the placeholders in the report template, we just need to fill in the fields with the correct values:
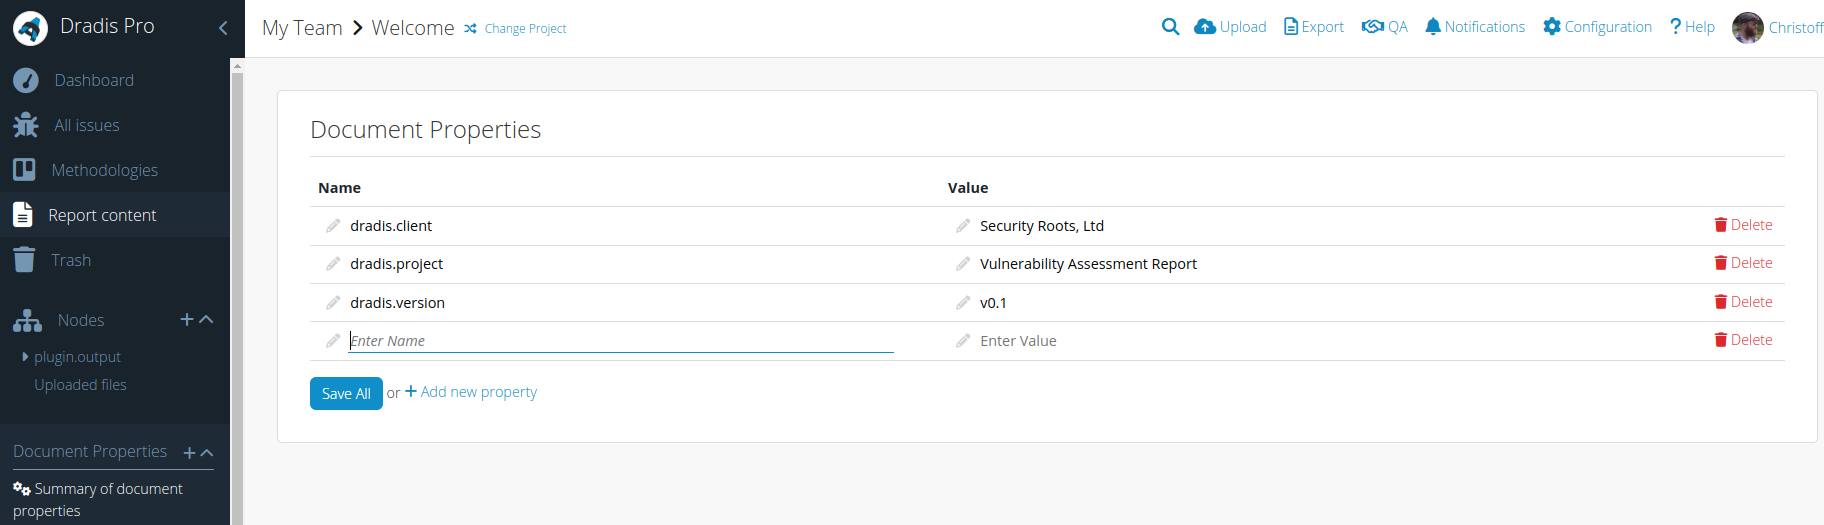
You may also manually add new Document Properties within the Project even if those Properties are not defined in your report template properties, or if you are working in a project not associated with a report template. Click on the '+' icon on the sidebar to add a Document Property.
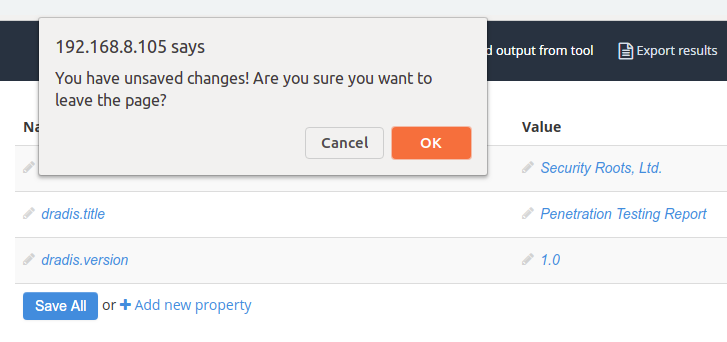
Remember to click the Save All button after updating your document properties. If you attempt to navigate away from the page without saving your document properties, you will get a warning so you don't lose your data.
If you are planning exporting your project to Word templates and/or to Gateway themes, then you can also use a Liquid drop to refer to document properties anywhere in your Dradis project - for example, to refer to dradis.client within a Content Block. You may also be interested in using document properties for conditionals when exporting to Word or Liquid templates.
Migrating an old-style Project
Previously, the document properties and content blocks were stored in Notes set to specific categories. If you import one of these old-style Projects into Dradis, it will be automatically migrated for you so that you can use the new Report content page with Document Properties and Content Blocks.
When you import your old-style Project, you'll see an alert like this on the Report content page and on the Project Summary page:
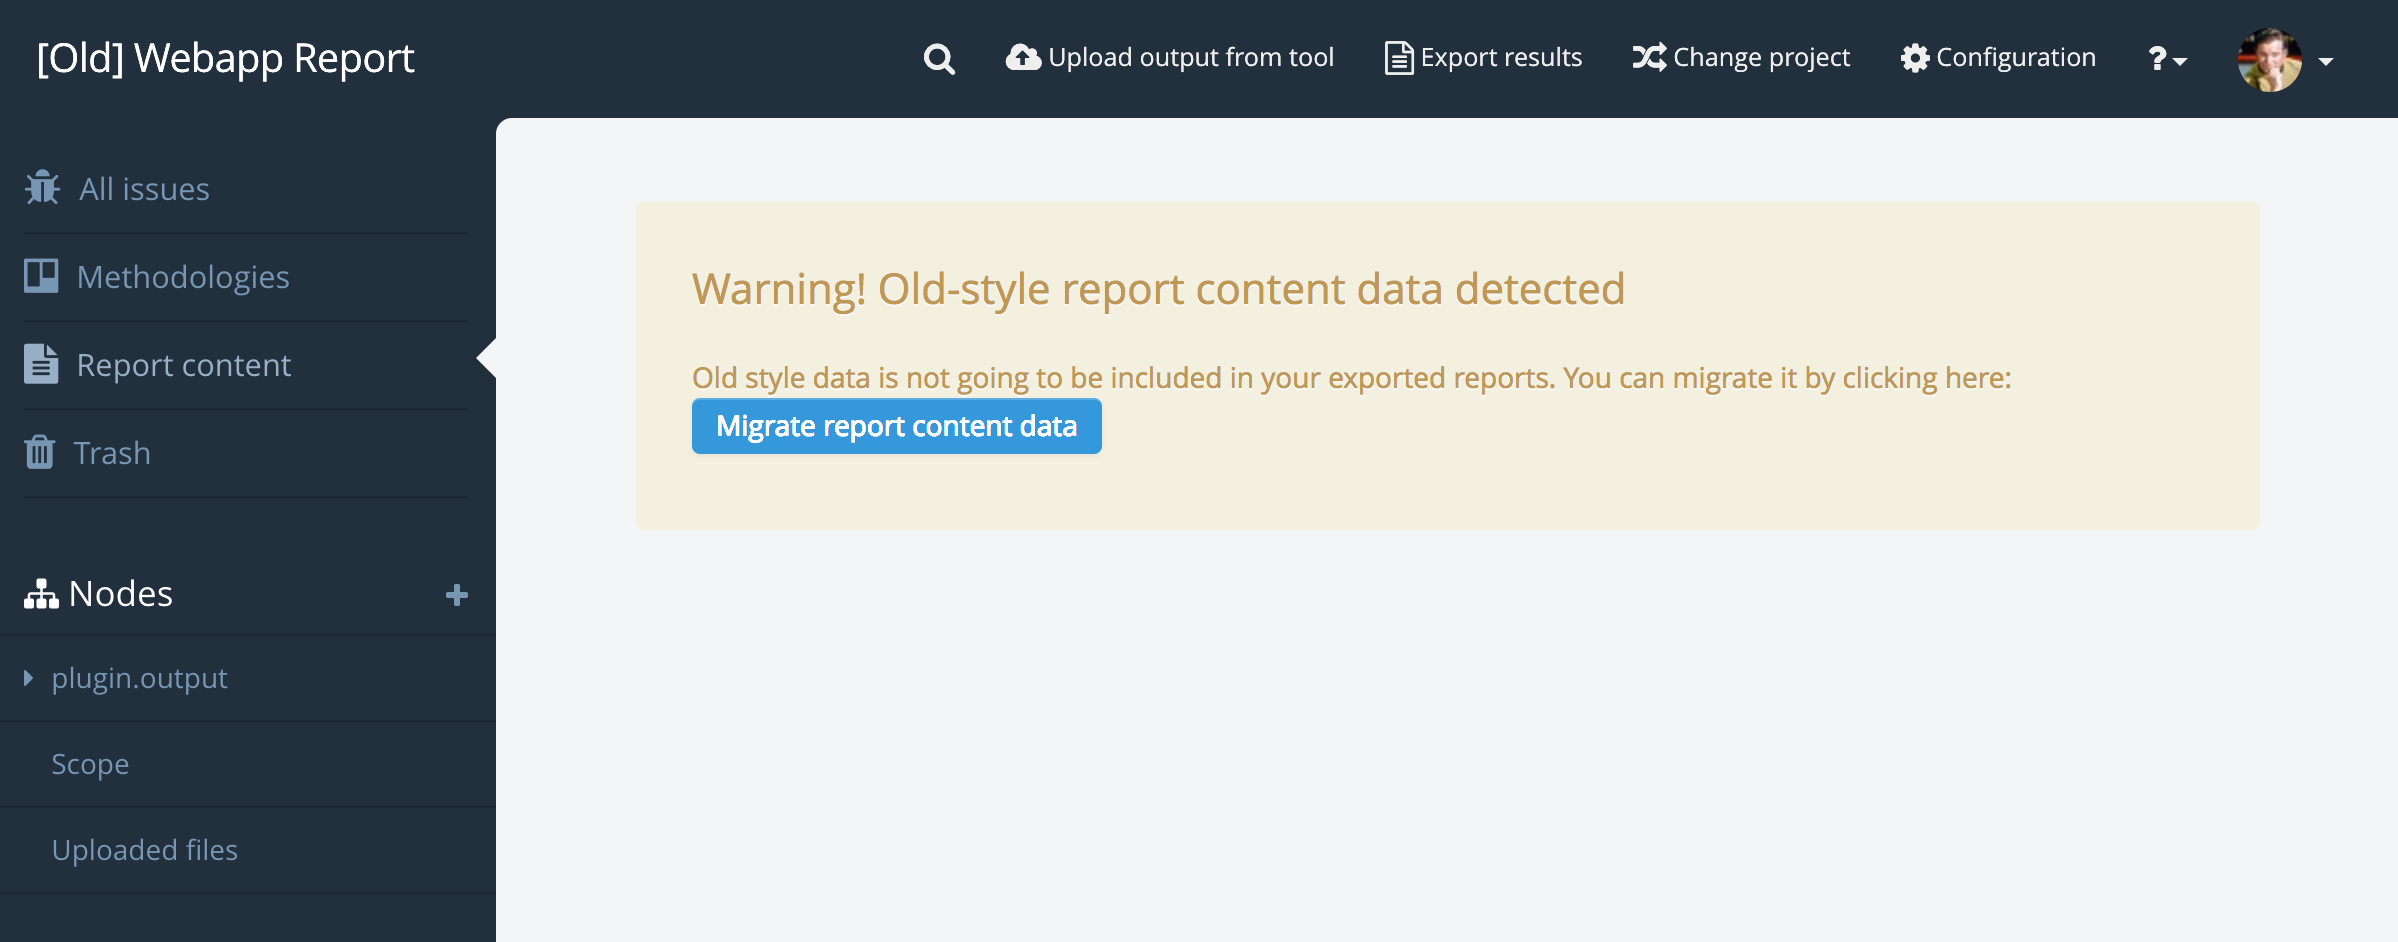
Just click the Migrate report content data button!
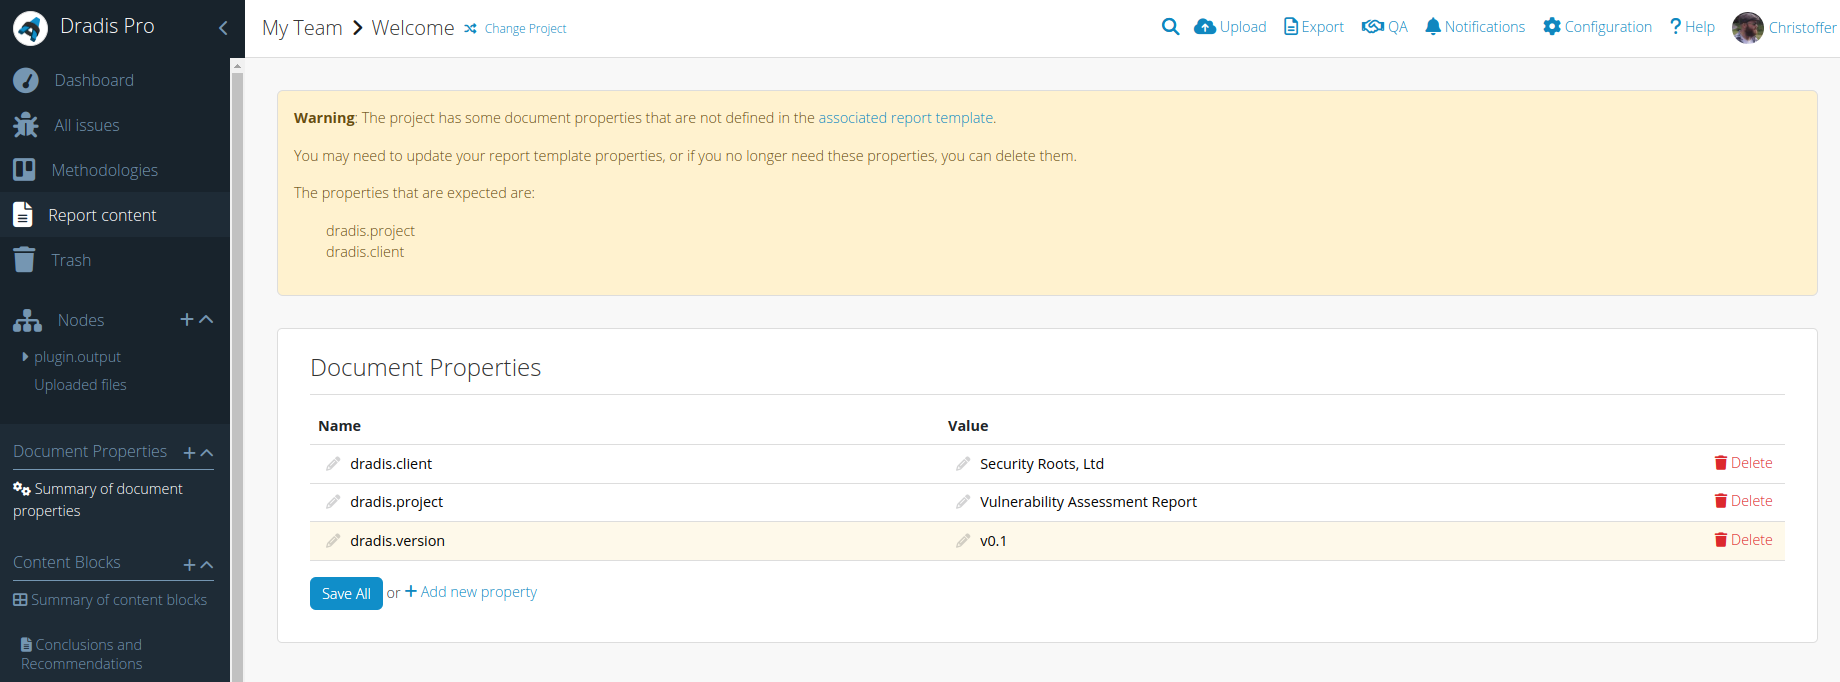
The document properties and their values from your imported project will appear on the Report content page once the migration has finished. If they do not appear, walk through the steps outlined above.
If you have a property in your imported project that isn't defined in the Document Properties of your Report template properties, it will appear highlighted in yellow as shown below. If you are confident that this document property (e.g. dradis.version) isn't needed, you can go ahead and delete it.
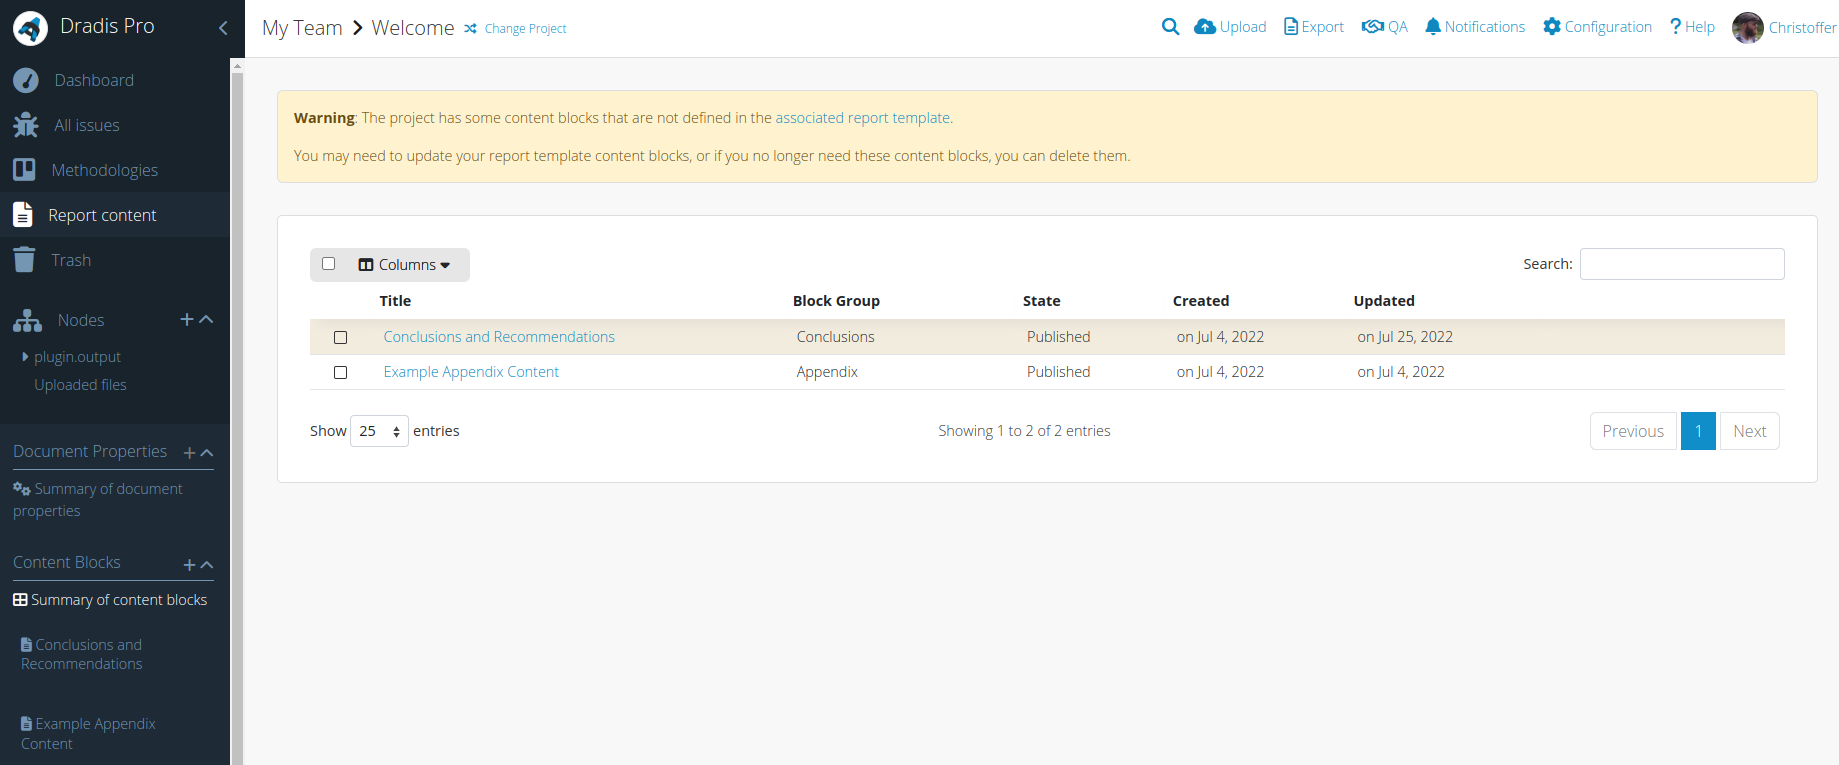
The Content Blocks will also be converted. If you have a content block in your imported project that isn't defined in your Report template properties, it will appear highlighted in yellow as shown below.
In some cases, Dradis just wasn't able to match the Content Block to a Block Group. If you edit the Content Block and select the correct Block Group from the dropdown at the top, the Content Block will appear correctly without the highlight.
If you are confident that this Content Block (e.g. Conclusions and Recommendations) isn't needed, you can go ahead and delete it.
Next help article: Adding issues and evidence →