Tagging issues
This page contains:
The most common use of tagging is to help visualizing the data in your project.
It doesn't really matter what risk rating your are using (CVSS, DREAD, High/Medium/Low, Impact and Probability scores, etc.) you will almost always want to be able to see a graphical representation of the issues identified so far:

To adjust the tags associated to your issues, head over to All issues on the sidebar. By default you'll land in the Summary of issues screen, where you can review and adjust the tags:
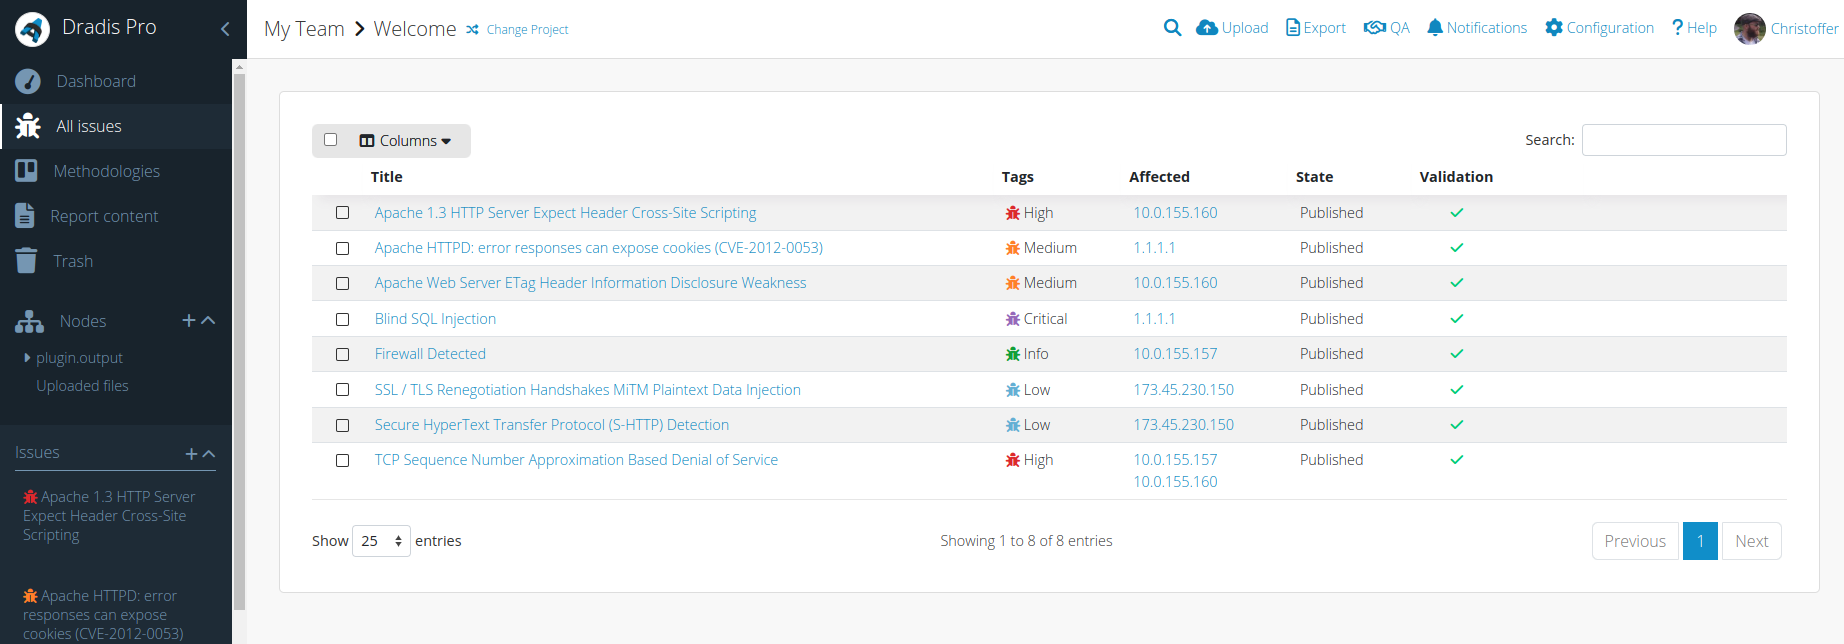
If you open any Issue description, just click Summary of issues to go back again to the table.
Tagging an Issue
To adjust the tags of a given issue, select it with the checkbox in the corresponding row to trigger the actions toolbar:

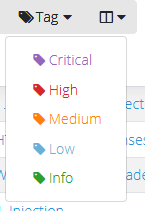
Open the tags drop-down menu and select the tag to be applied:
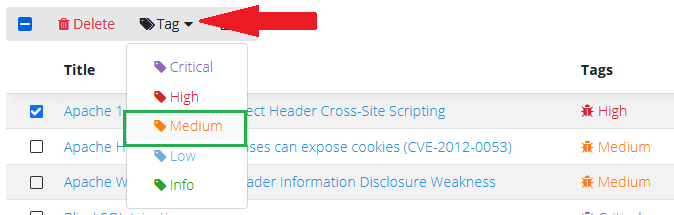
You can select multiple rows to apply the same tag to different items.
You can also add tags to issues by using a Tags field when creating (not updating) an Issue.
- Add the Tags field to your Issue with the following line:
#[Tags]#
- Decide on the color of your tag and find the corresponding Hex code. In our example, we're going to create a purple tag (Hex: #9467bd).
- Decide on your tag name. In our example, we're going to use the tag name Critical.
- Build the tag by using the following format for the Tags field value:
![HEX]_[NAME]
In our example, the finished tag value is!9467bd_Critical. - Insert the value you just created under the Tags field in your Issue. In this example:
#[Tags]#
!9467bd_Critical
Similarly, you can add tags to issues when creating them with the REST API using the #[Tags]# field.
Default tags
Want to tag your IssueLibrary entries? Get more details on this other kind of tags in the Tag your IssueLibrary entries of the IssueLibrary guide.
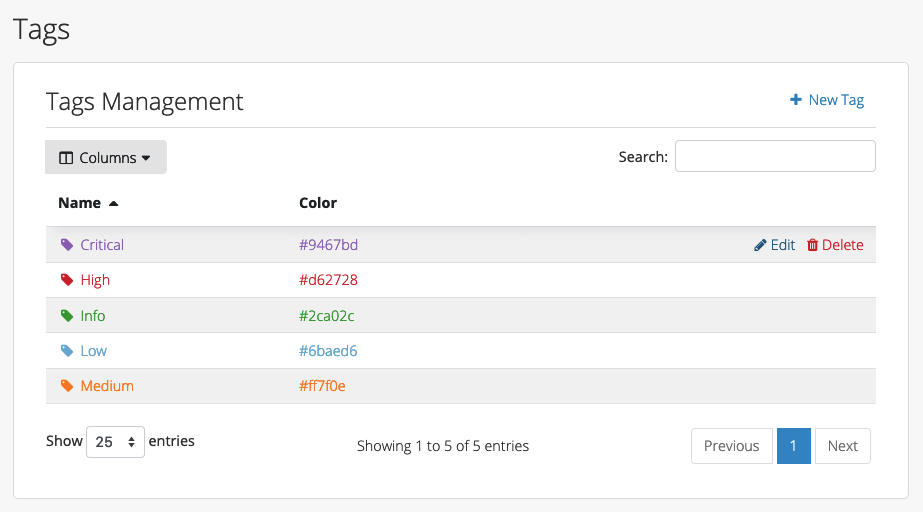
Out of the box, your Dradis projects will be created with the following set of tags:
| Tag | Definition |
|---|---|
| Critical | !9467bd_Critical |
| High | !d62728_High |
| Medium | !ff7f0e_Medium |
| Low | !6baed6_Low |
| Info | !2ca02c_Info |
Custom tags
If you want to customize the names or colors of your tags, you can now manage, create, and delete tags from inside of your project.
While our default tags are based on the risk rating, you could tag the findings based on Type (Internal vs Internal), use non-English tag names, or even add in custom risk ratings like VeryHigh or VeryLow.
To start editing the tags, either edit an existing finding or create a new Issue.
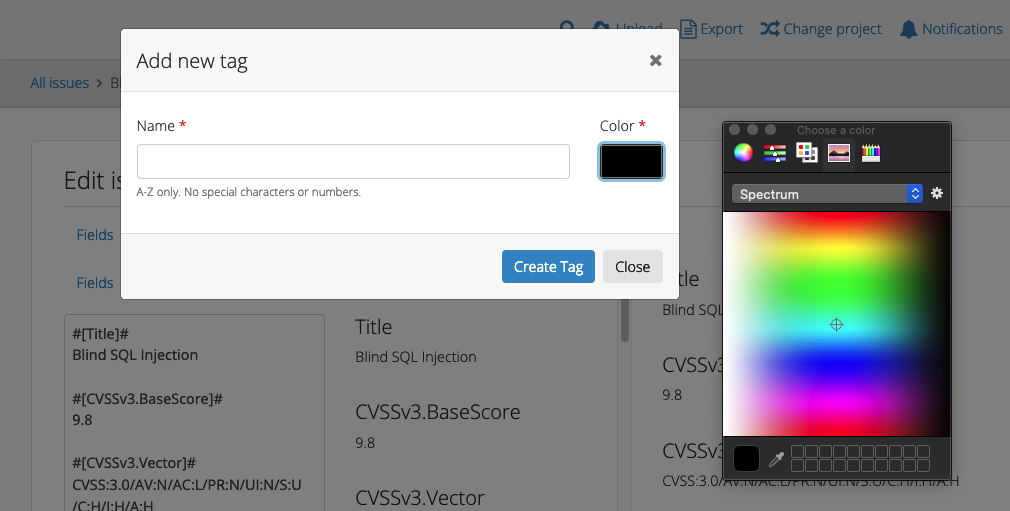
Select the tags, then either Add a new tag or Manage tags.
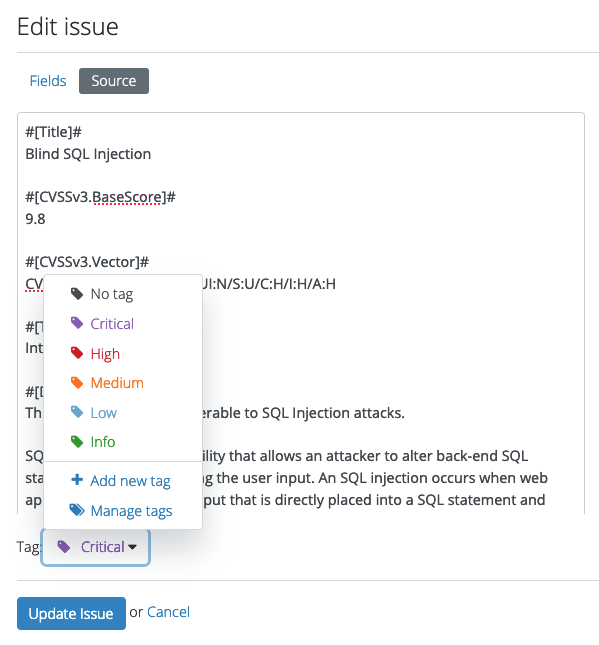
Add a new tag will bring up a form where you can use colorpicker options to select the color for the tag. Then, give the tag a name before selecting Create Tag. That's it! You created a new custom tag and you can immediately use it to tag Issues in your project.
Manage tags will bring up a table where you can manage all of the different tags in your project. In the top right, there is a + New Tag option that brings up the same form as Add a new tag. You can also edit and delete existing tags from this page.
Want to save these custom tags for later? Head over to the Project templates page in the Administration manual to create your custom project template that you can reuse again and again.
Using tags in your reports
When creating your report template, you can filter issues by tag using the following filter definition:
Tag|<Name>For example:
Tag|CriticalLearn more about filtering and filter definitions in the Filtering and sorting page of the Custom Word reports manual.
Don't want to manually tag findings? You can use the Rules Engine to create rules so that findings are automatically tagged when you upload plugin output. For more information and examples, check out the Action: Tag findings page.
Next help article: Using methodologies →