Upload and work with tool output
This page contains:
This guide is a high-level overview of the process to upload tool output to your Dradis projects.
When you are working with security scanners like Nessus, Qualys, Burp, and more, you wil quickly notice that the different scanners don't speak the same language. Fields may have different names and data is often organized differently within a scan. And, you can bet that none of these scanners speak the language of your report template.
In order to get everyone on the same page, we're going to use the Mappings Manager to "translate" for us. The goal is to have every tool output translated into the "language" that your report template is looking for.
The Process
When you're working with a custom report template, you'll need to do a some setup to configure the Mappings Manager before you upload your tool output.
- Configure the Mappings Manager to match your report template.
- (Optional/Advanced) Add Rules to your Rules Engine. Make sure to use the field names you defined in the Mappings Manager.
- Within a Dradis Project, navigate to Upload in the header and select the file type from the dropdown.
-
Dradis will now check your Mappings Manager setup for that output file type against your report template configuration.
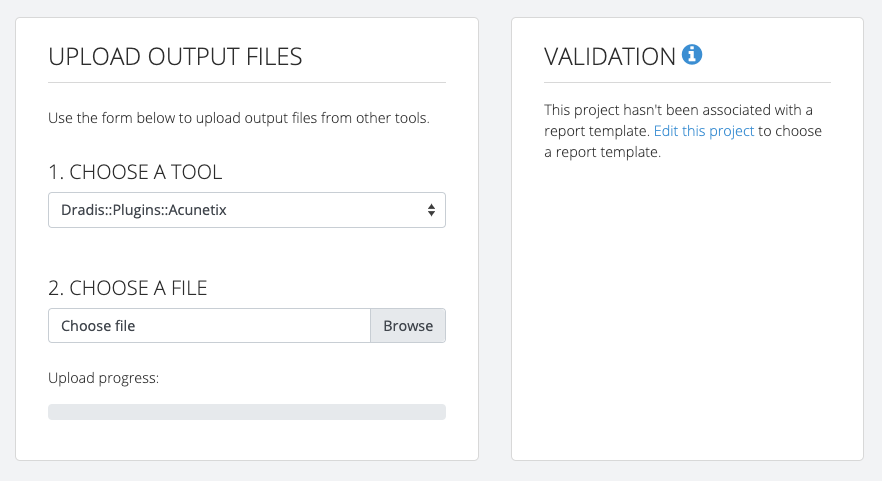
- If your project is not associated with a report template, you will see a warning.
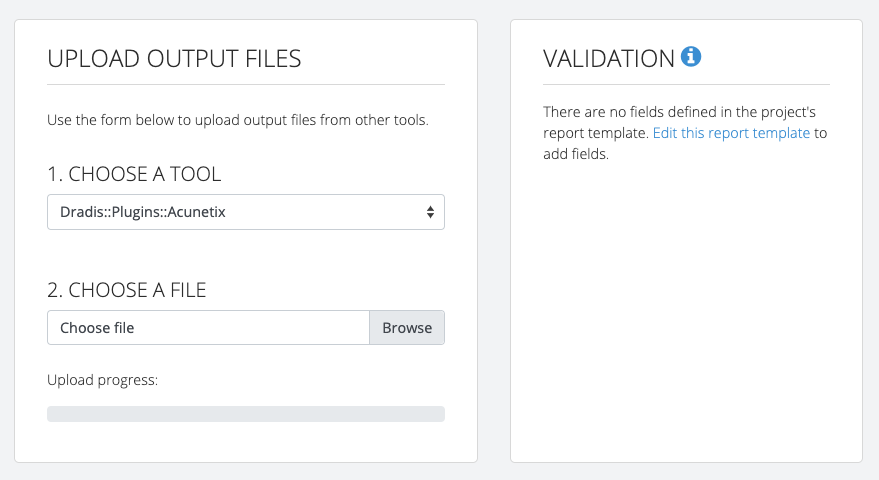
- If your project is associated with a report template that does not have any report template propertiesdefined, you will see a warning.
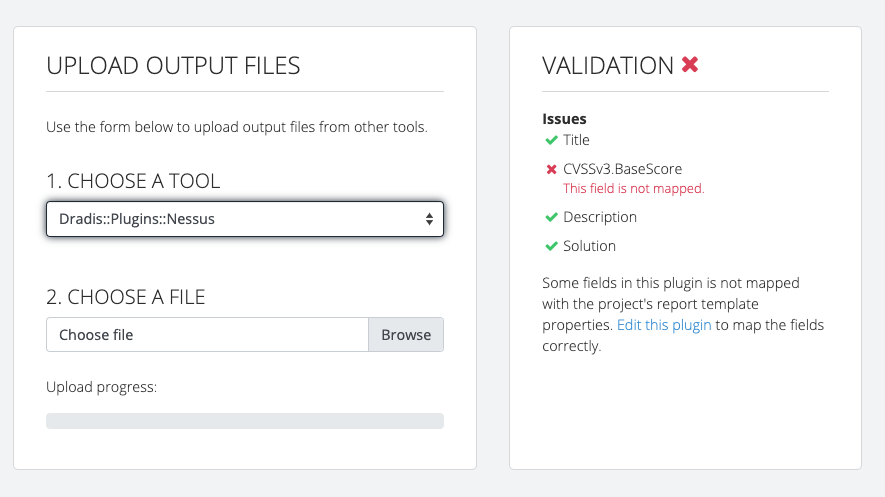
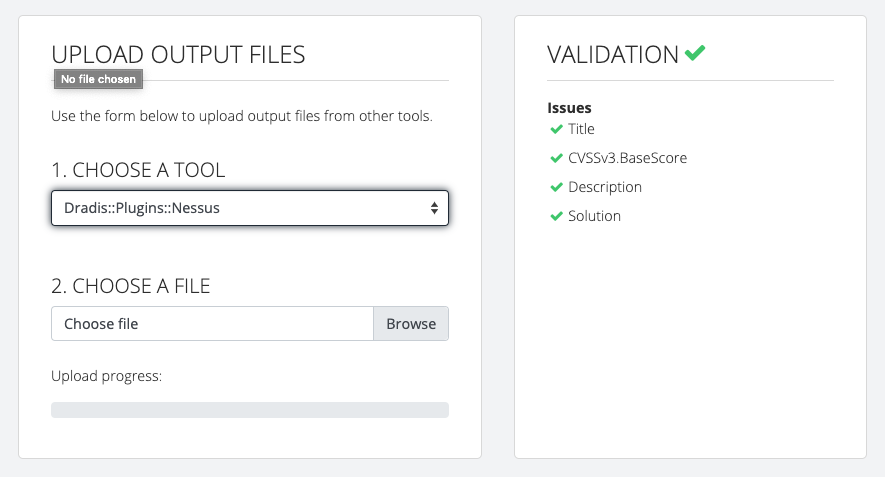
- If, for example, your template is configured to require a CVSSv3.BaseScore field but no
#[CVSSv3.BaseScore]#field is defined in the Mappings Manager for this tool in the relevant template, Dradis will throw a warning that the field is not mapped. - If all is well, you'll see a green check:
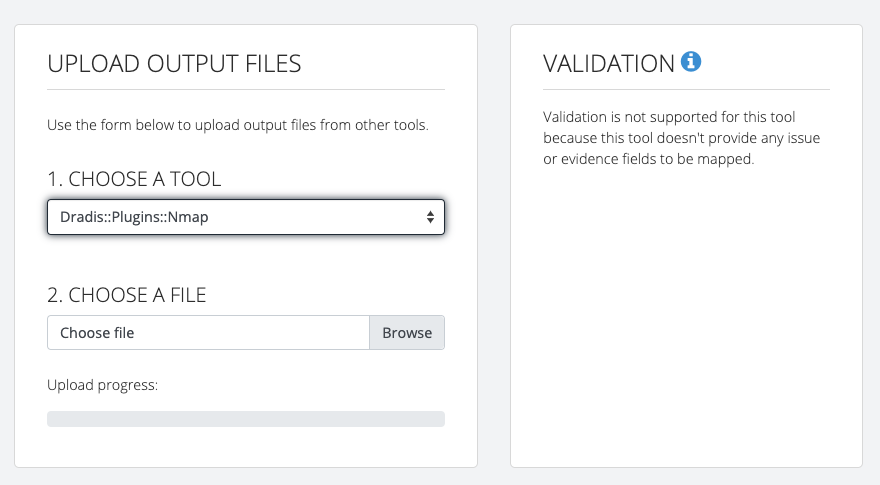
- Some tools, such as Nmap, don't allow for consistency checks in Dradis. You can still pull in the data as per your Mappings Manager configuration, but the data can't be compared against report template properties. In such cases, Dradis will display the following.
- Then, upload the tool output file from your local system.
- Marvel at the magic and how the freshly imported Issues and Evidence match the format that your report template is looking for.
Behind the scenes
When working with the Mappings Manager, the Rules Engine, and a custom report template, there are several important details to keep in mind.
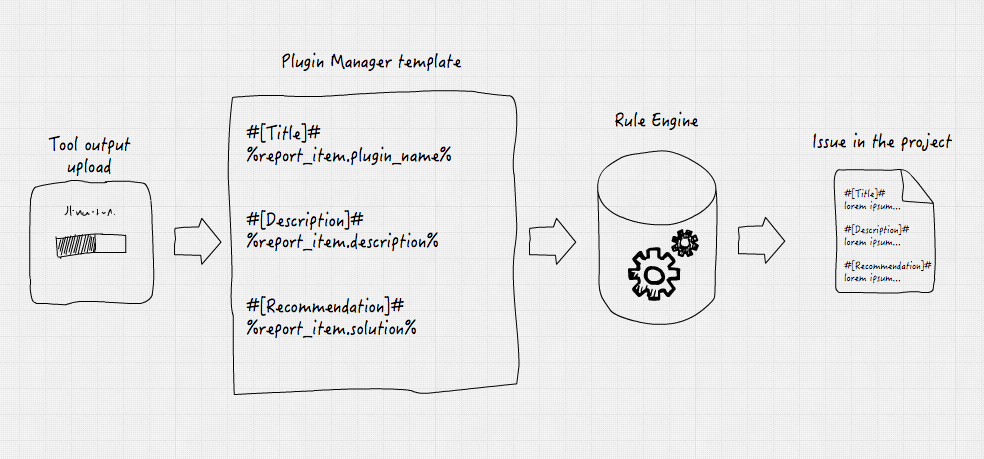
- When you upload a tool output file to a project, that file is first going to run through the Mappings Manager. There, the fields you've defined (e.g. #[Title]#) will be created and the data from the tool (e.g. %report_item.plugin_name%) will be put underneath the correct fields.
- When the tool output leaves the Mappings Manager, the only data left is the data you configured the Mappings Manager to include. For example, if you are working with tool that defines a %report_item.severity% field but you have not included that field anywhere in your Mappings Manager template, this field and data will not be accessible downstream in the Rules Engine or in your Dradis project.
- Next, the tool output runs through the Rules Engine which checks to see whether the data meets the triggers of any your active Rules. You can learn more about creating Rules in the Rules Engine guide but the important takeaway is that the Mappings Manager applies first. By the time the tool data makes it all the way to the Rules Engine, it is in "Mappings Manager format" with the field names and values you configured.
- The tool output is only added to your Dradis project after running through the Mappings Manager and the Rules Engine. With a little setup and configuration before uploading, the Issues and Evidence should be ready to export into your custom report template with little to no manual work required on your part.
The graphic below gives a visual overview of this process. The tool output moves left to right through the upload process, the Mappings Manager, and the Rules Engine before being added into your Project.
Examples
The videos below shows the process to go from a tool output file to a exported Word report. It does not cover the Rules Engine but gives a good step-by-step overview of how to configure the Mappings Manager to integrate with your custom report template.
Video - From Nessus to Word
Video - From Qualys to Word
For more details on the concepts covered in this guide, please check out the Mappings Manager guide and the the Rules Engine guide.
The flow for tool output in CSV format is slightly different. For more details on CSV uploads, see the Upload and work with CSV files guide.
Next help article: Upload and work with CSV files →