Configure the Burp-Dradis Extension
Send issues directly from Burp's Scanner into your Dradis project using the REST API.
This guide contains:
- Before you begin
- Install the Burp-Dradis Extension
- Configure the Burp-Dradis Extension
- Send Issues to Dradis
Before you begin
This guide assumes that you have Burp Professional Edition installed and activated on your local system. If you don't have Burp Professional Edition installed and activated, please visit the PortSwigger website for more details.
Install the Burp-Dradis Extension
Within the Burp interface, navigate to the Extender tab, open the BApp Store tab, and select the Dradis Framework extension.
Click Download JRuby and download a
.jarfile from JRuby.Back in the Burp interface, navigate to the Extender tab and open the Options tab.
Under Ruby Environment, select the
.jarfile from your local system.Navigate back to the Extender tab, open the BApp Store tab, and click Refresh List.
-
Select the Dradis Framework extension again and confirm that the Install button is now available.
If the Install button is not available, check the Ruby Environment configuration and the
.jarfile that you selected. Click Install and confirm thaht the Installed checkbox is now selected for Dradis Framework in the list of extensions.

Configure the Burp-Dradis Extension
Under the Dradis Framework tab, you'll need to configure several values.
If you don't see the Dradis Framework tab, make sure that you've properly installed the burp-dradis extension.
Dradis URL
This is the URL of your Dradis instance. Enter that value into the Dradis URL field in Burp's Dradis Framework tab.
API Token
Log in to Dradis and open up your profile by clicking the avatar icon in the top right corner of your screen. Then, select Profile from the dropdown that appears.
On your Profile page, scroll down below Confirm password to find your API token:
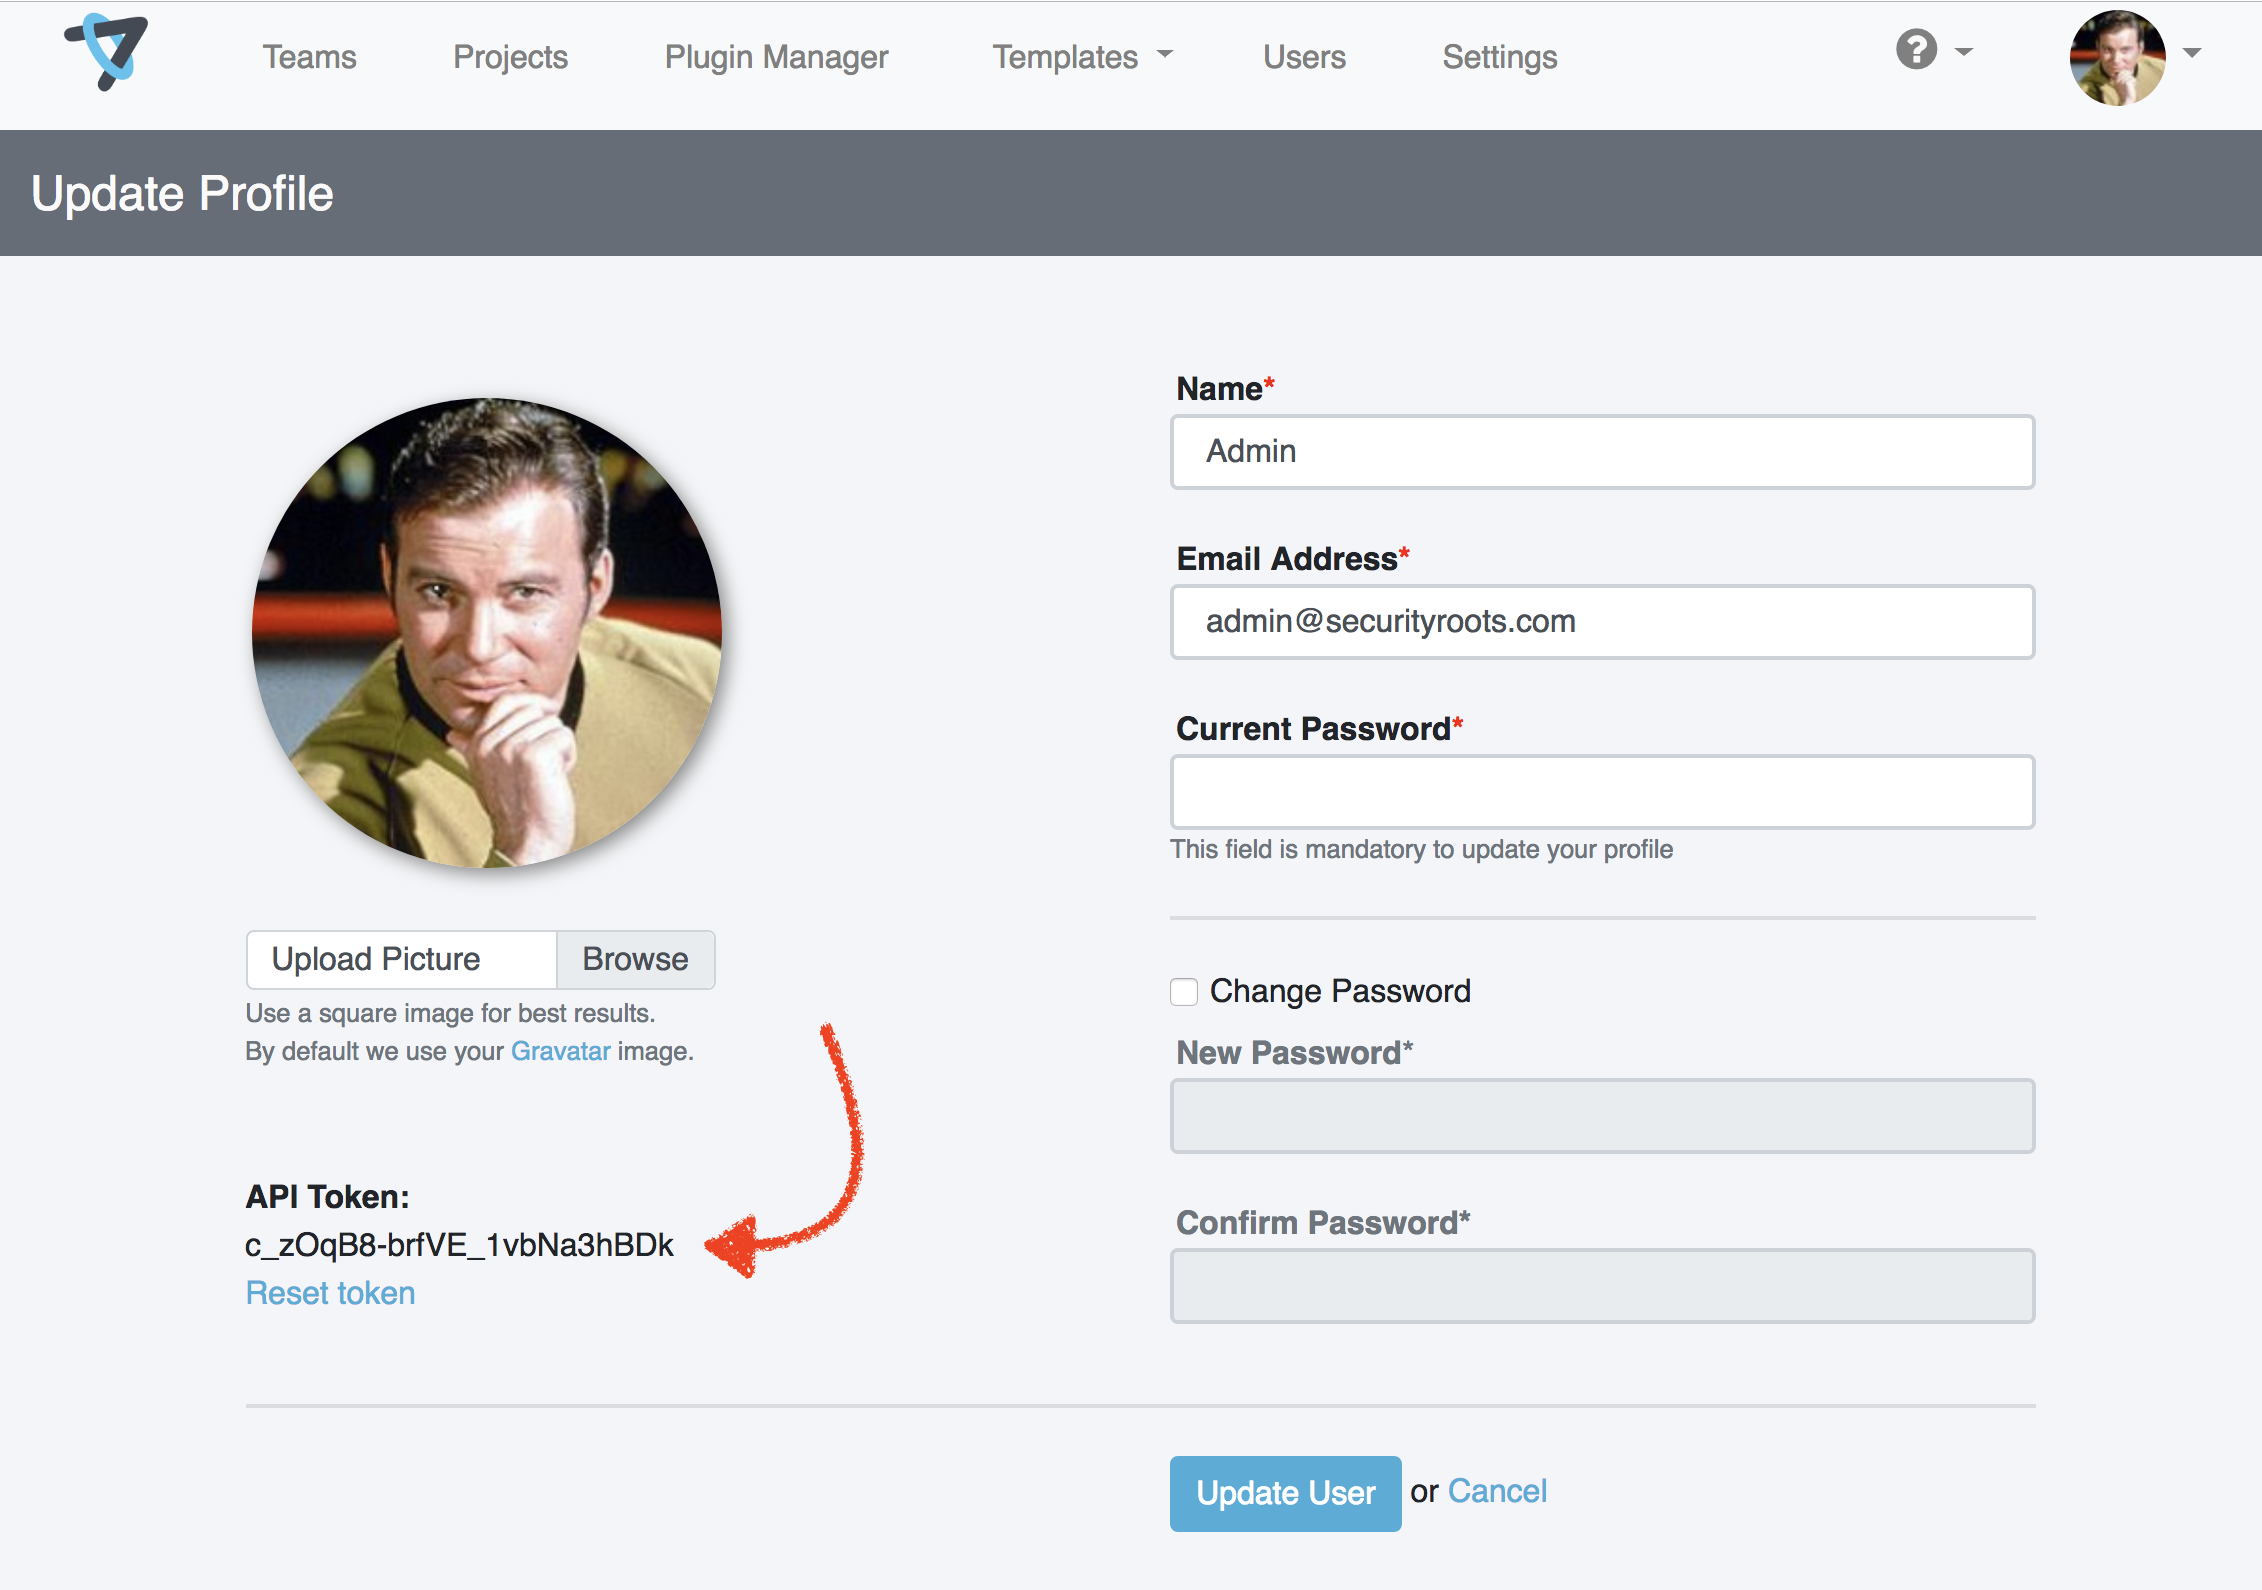
Paste that API token value into the API Token field in Burp's Dradis Framework tab.
Project ID
Find the ID of the Project you want to send the Issues to by examining the URL within Dradis. If the Project ID is 23 the URL will look like /pro/projects/23.
Enter that ID value into the Project ID field in Burp's Dradis Framework tab.
Path
This one is easy! Set it to: /pro/
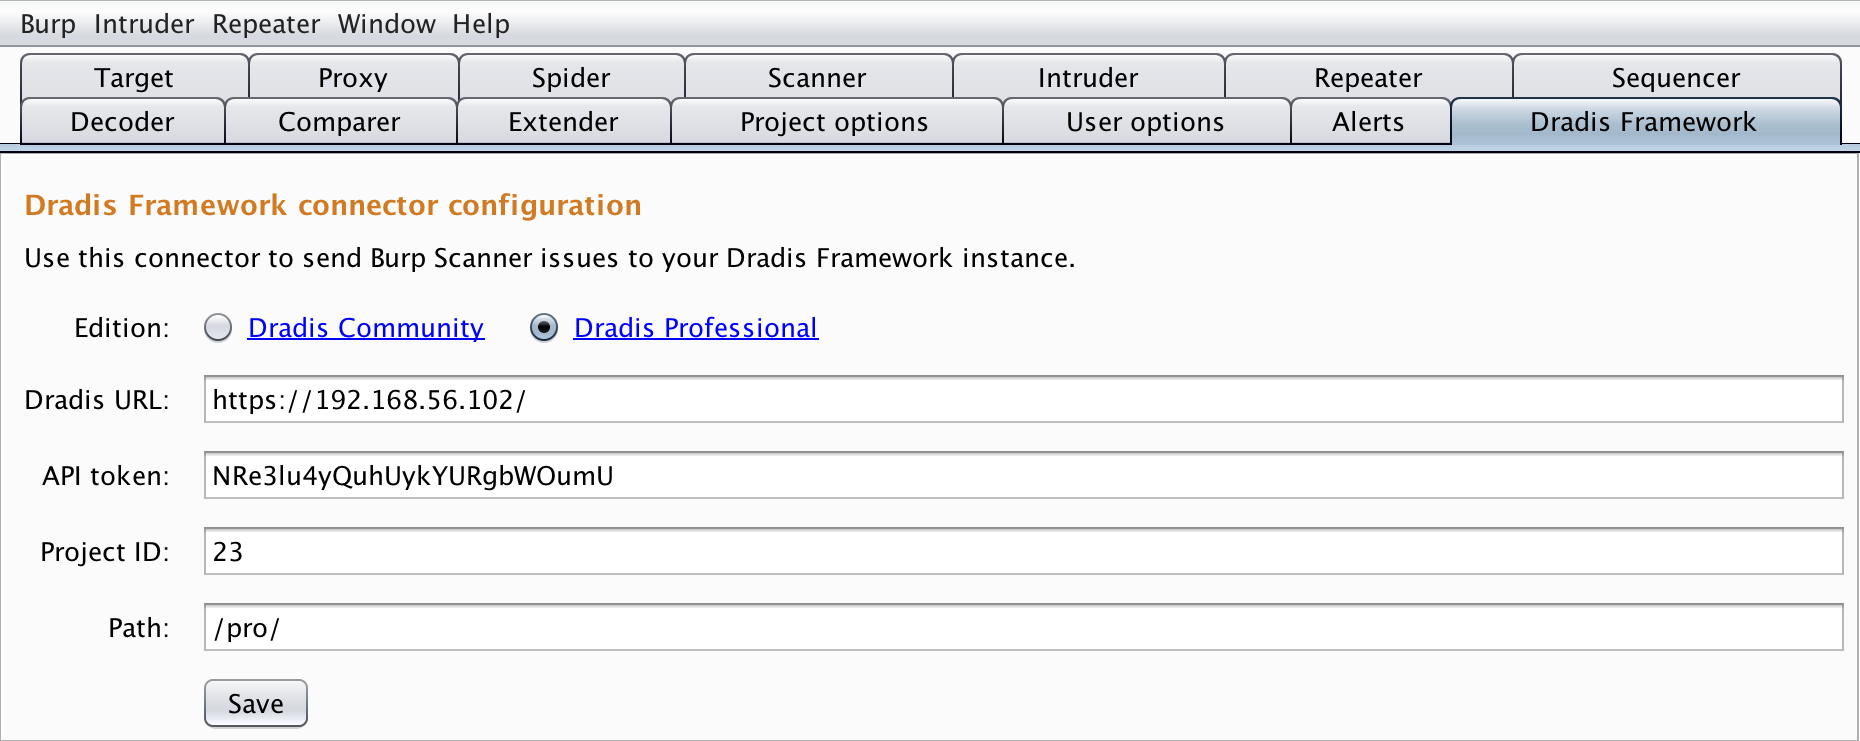
Once you've configured all of the values above, don't forget to click Save before moving on!
Send Issues to Dradis
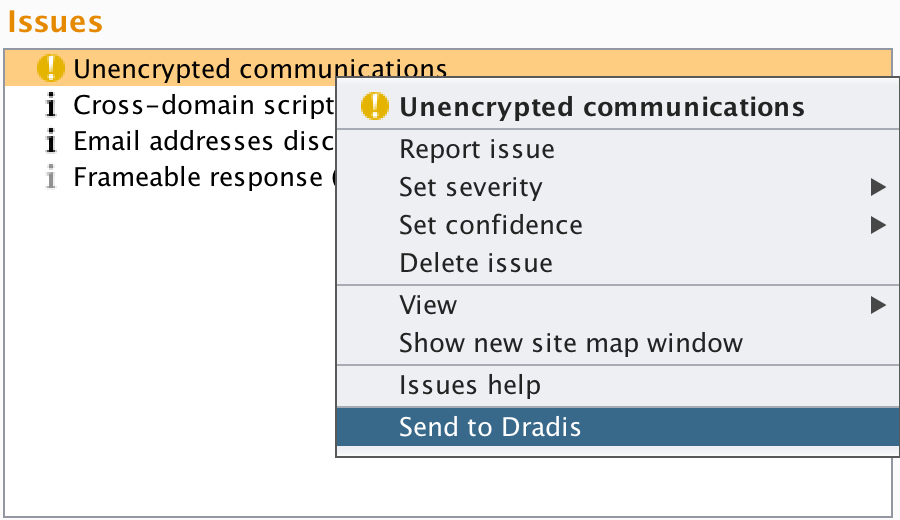
First, do your thing! Collect all your data within Burp. Run scans, perform tests, and find issues.
- Within Burp, open the Target tab, then open the Site map tab.
- Find a host that contains an Issue that you want to send to your Dradis Project.
- Right-click on the Issue and select Send to Dradis from the dropdown that appears.
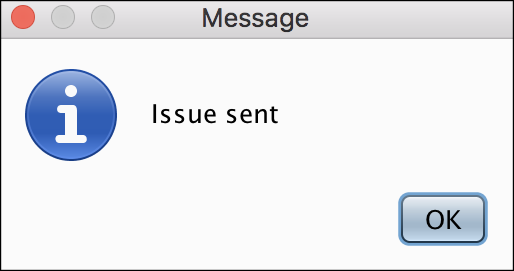
If you see this message, congratulations! You just sent an Issue from Burp to your Dradis Project.
Next help article: Connecting Dradis to MediaWiki →