Installing Dradis on Cloud9
If your answer is not here the Community Forums are your best bet.
Use this guide to install Dradis Community Edition and get up and running in the Cloud9 IDE. Unlike a local installation, you won't be able to take this instance of Dradis offline. But, you'll have access to Dradis anywhere that has an internet connection.
Running Windows and don't have access to Kali Linux? Use Cloud9 to get up and running with Dradis with just your browser, and fast!
Getting started on Cloud9
-
Sign up for a free account at Cloud9.
They have premium plans if you're interested in more workspaces or more diskspace. However, to launch and use Dradis, you can use their free account.
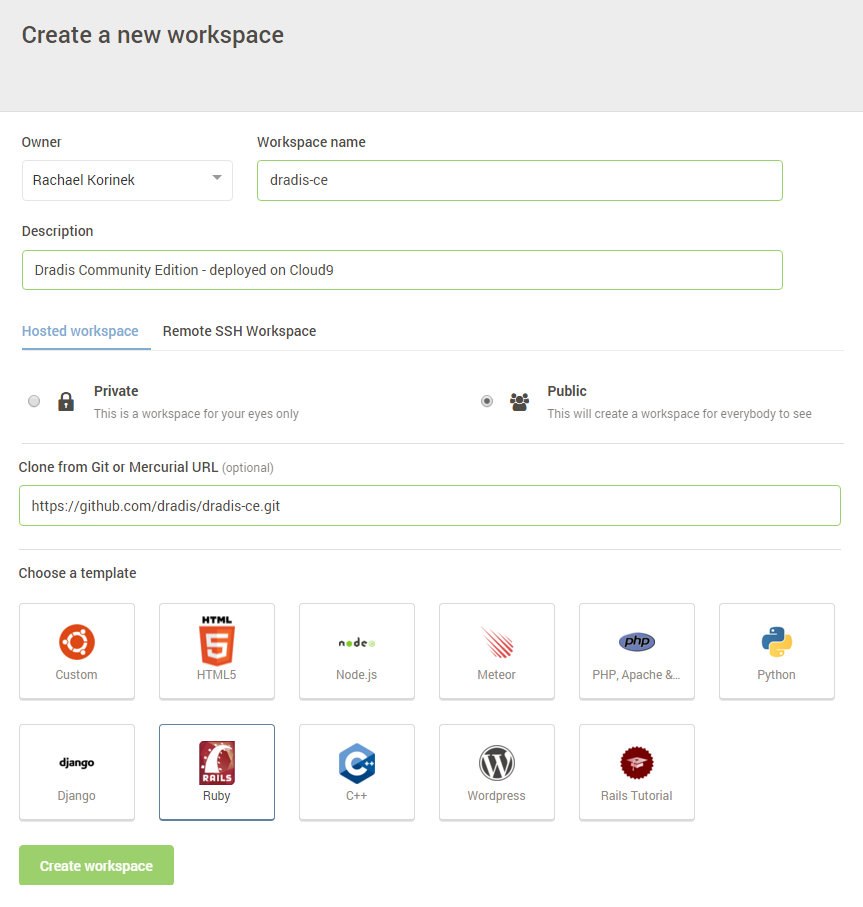
From your Cloud9 dashboard, click + Create a new workspace
Give your workspace a name (any name)
Optionally give your workspace a descriptionFor this guide, we're going to be working with a Hosted workspace. Make sure to select either a Private or a Public workspace.
Enter the following value into the Clone from Git or Mercurial URL field:
https://github.com/dradis/dradis-ce.git
Under Choose a template, select the Ruby icon.
-
Click Create workspace
Get your workspace in order
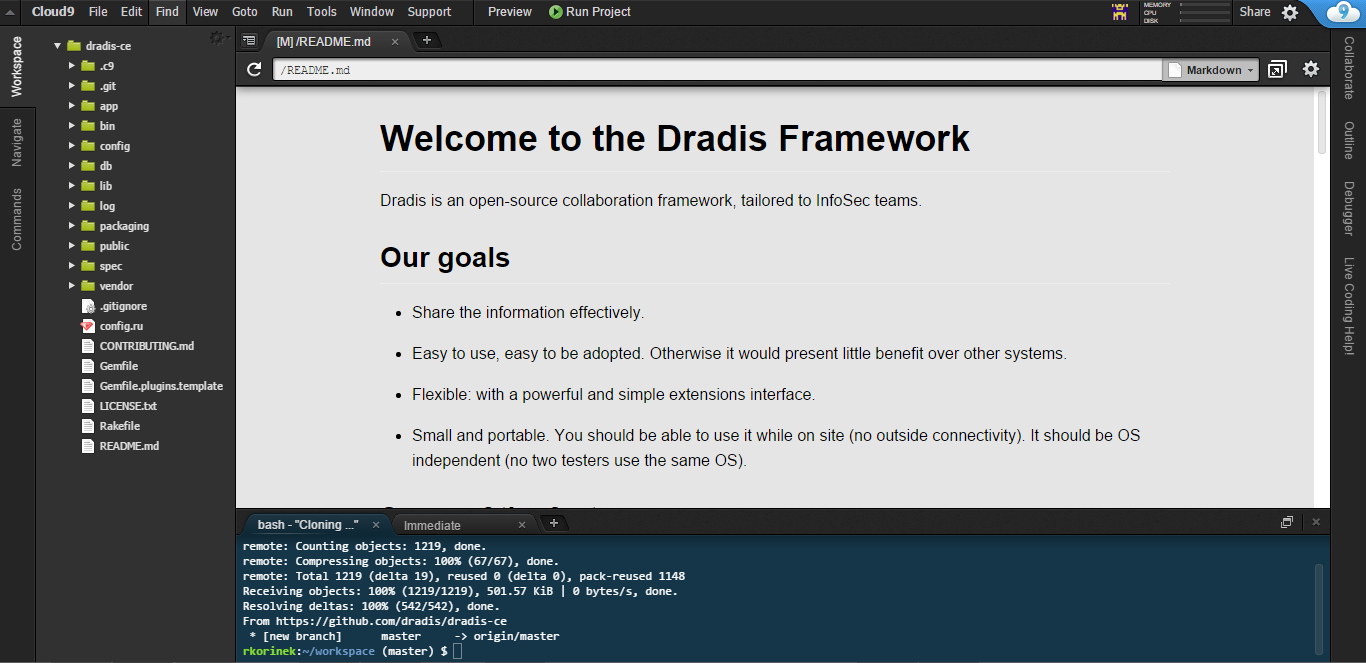
When your workspace is loaded, you'll be greeted by the following screen:
-
Run the following in the terminal at the bottom of your screen:
$ ./bin/setup
-
Run the following in the terminal at the bottom of your screen:
$ bundle install
Troubleshooting this step:
- If you get a message about
An error occurred while installing gem-name (1.0.0), and Bundler cannot continue
It's likely a system-specific dependency issue. The first line of defense is to Google the specific error message to see whether StackOverflow or similar sites offer a solution. If you cannot resolve the issue, let us know in the Community Forums - If you get a message like:
bash: bundle: command not found
Run the following in your command line before continuing:$ gem install bundle
- If you get a message about
-
Run the following in the terminal at the bottom of your screen:
$ ./bin/setup
Troubleshooting this step: If you get an error message similar to
"NoMethodError: undefined method `last_comment' for #<Rake::Application:0x007ff0cf37be38>", you can resolve it by inserting the following content in line #6 of yourRakefileto bypass an issue with Rake version 11:# temp fix for NoMethodError: undefined method `last_comment' # remove when fixed in Rake 11.x module TempFixForRakeLastComment def last_comment last_description end end Rake::Application.send :include, TempFixForRakeLastComment ### end of temfix
Run the following in the terminal at the bottom of your screen:
$ bundle exec rails server -p $PORT -b $IP
- In a new tab in your terminal, start the Background worker that is needed to upload and parse tool output by running:
$ sudo service redis-server start
-
Navigate to the URL where Dradis is now running! The url requires your workspace name (dradis-ce in this example) and your Cloud9 username (rkorinek in this example). The url uses the following format: [WorkspaceName]-[Cloud9Username].c9users.io.
Example: https://[workspace]dradis-ce-rkorinek.c9users.io/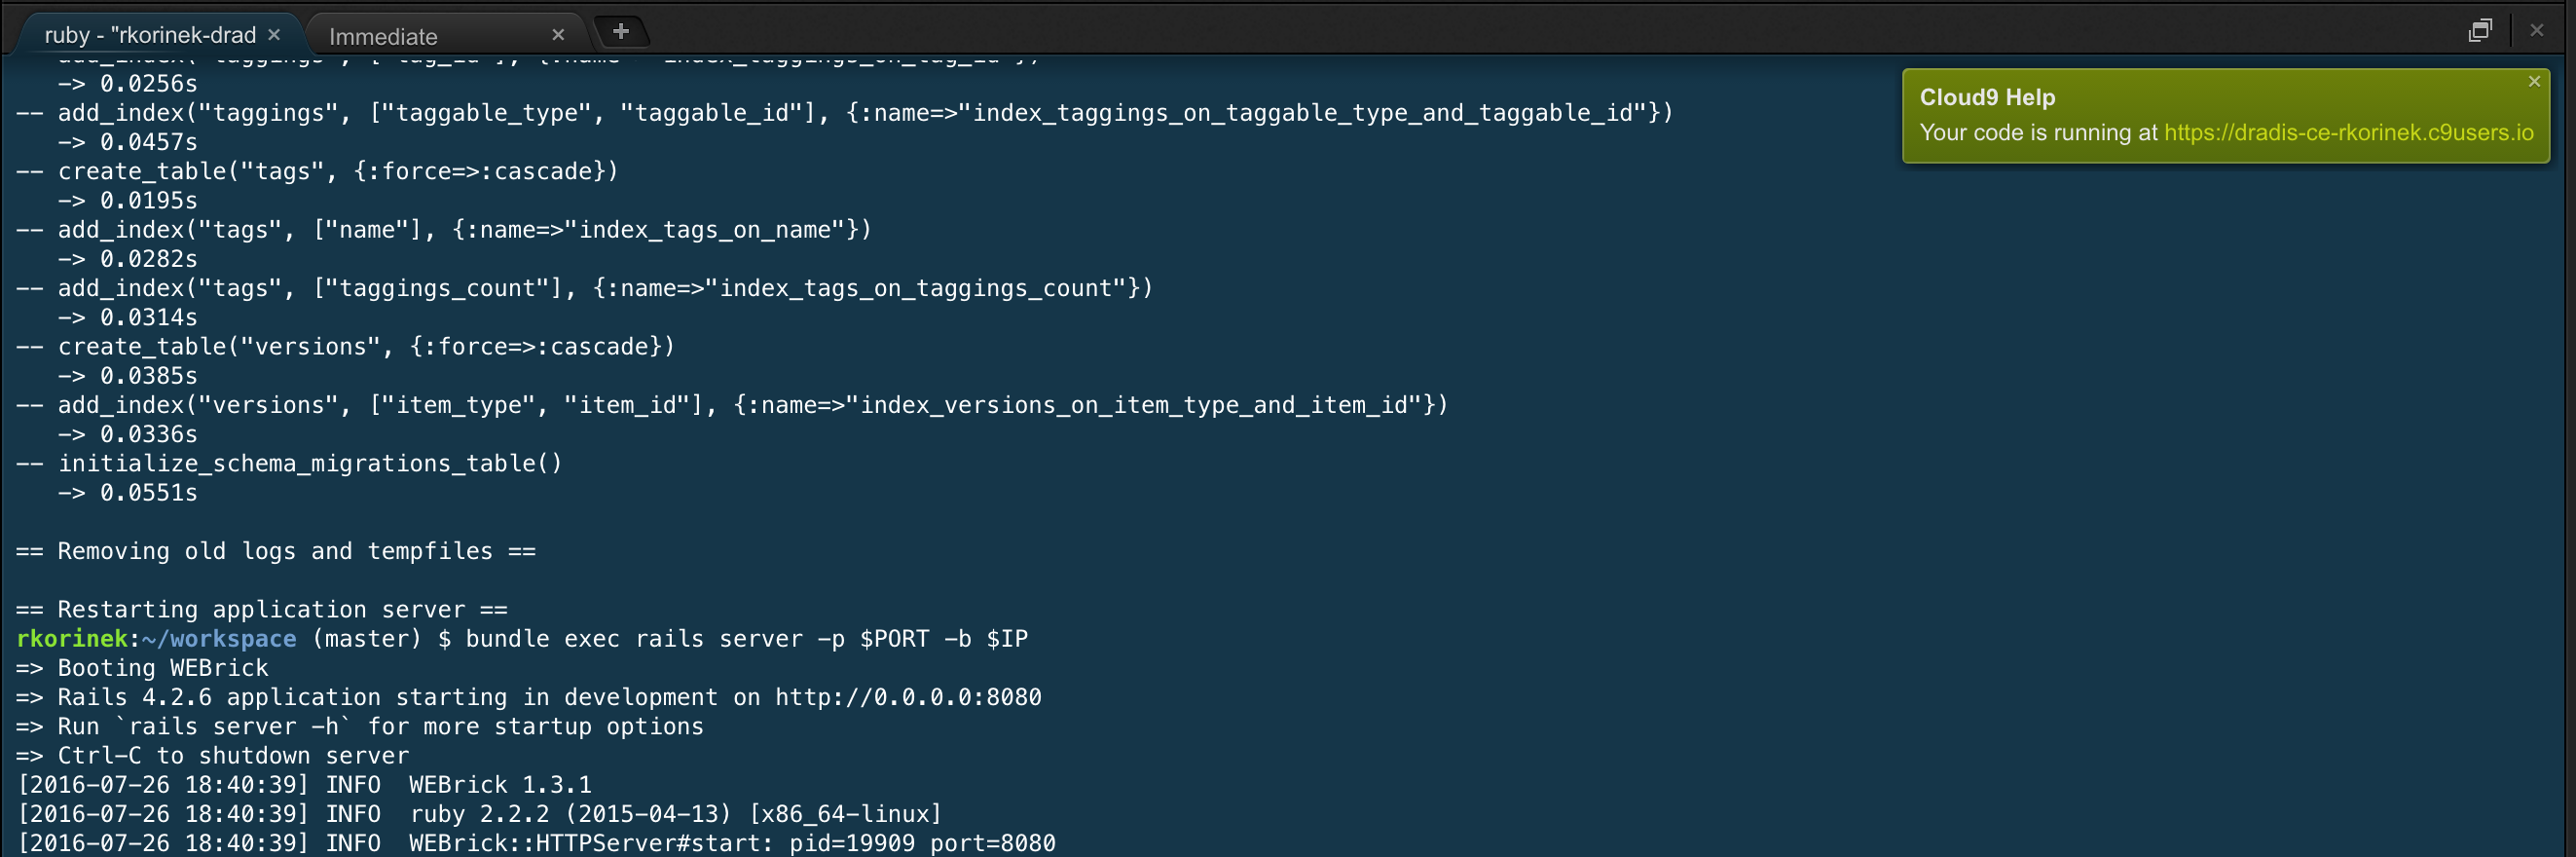
-
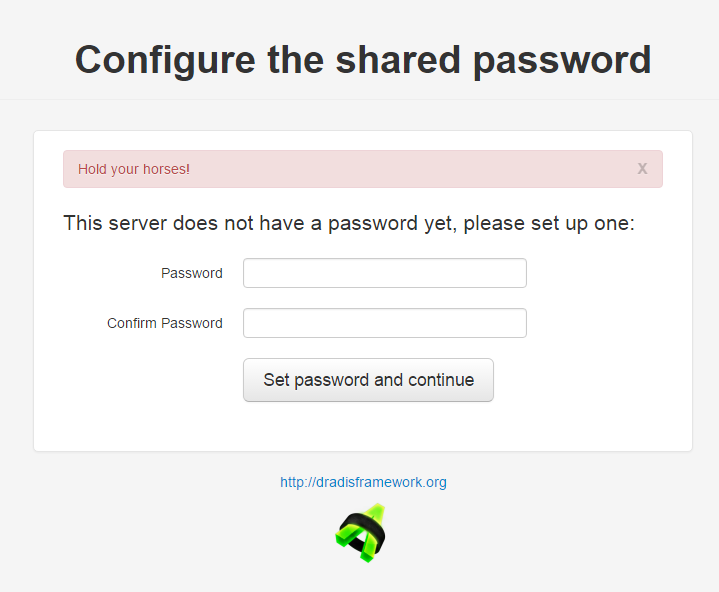
Configure the shared password by entering it and confirming it:
Troubleshooting this step: if you encounter an error message like
ActionController::UrlGenerationError in HomeController#index(pictured below) when you navigate to Dradis, go to
No route matches {:action=>"init", :controller=>"home"}/setupin your browser.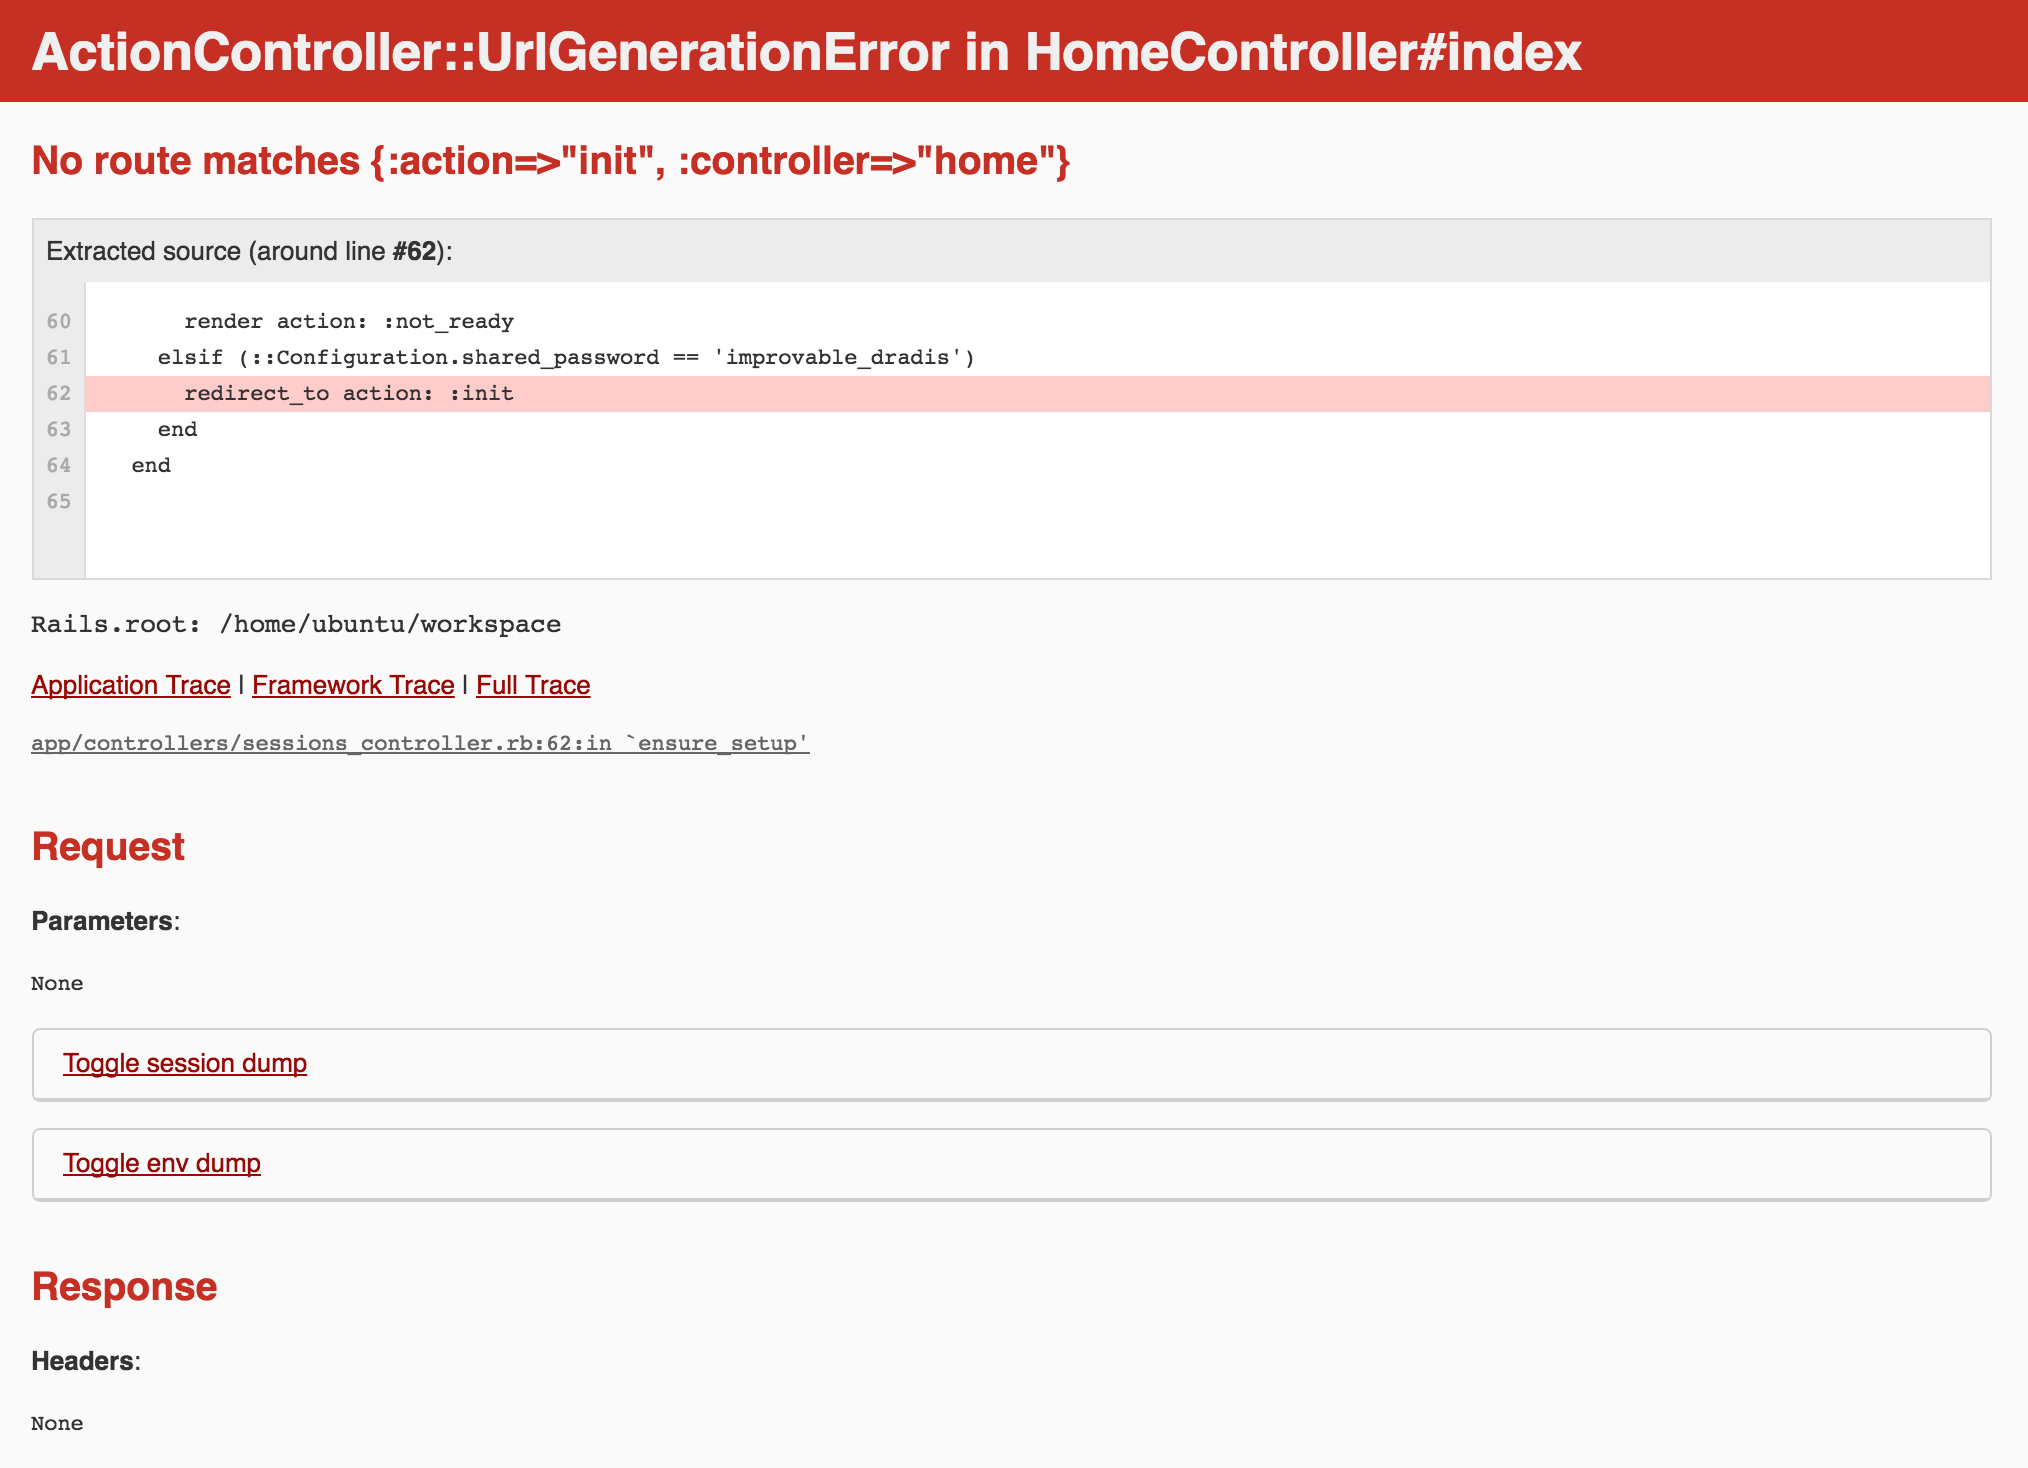
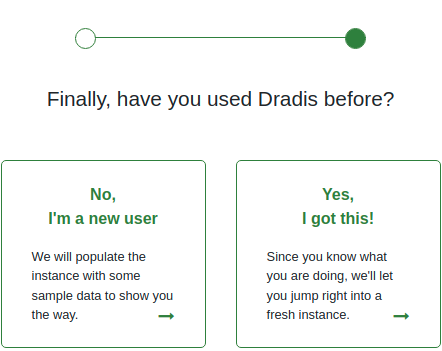
- If you are a new Dradis user, then select No, I'm a new user. That will pre-populate Dradis with some sample content and a starter guide so you can explore the features and functionalities of Dradis. Otherwise, select Yes, I got this! to create a blank Dradis instance.
-
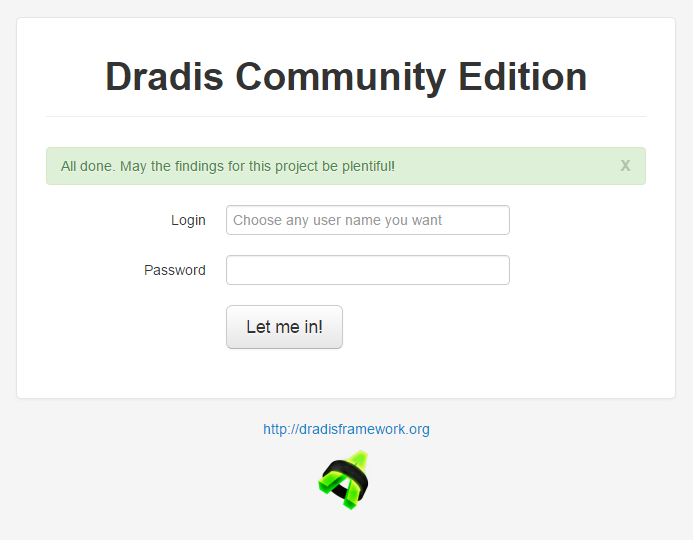
Create a username, then enter the password you created in step #3:
Congratulations!
You did it! You have now completed the installation process are are now running Dradis on Cloud9. Congratulations on making it all the way from git to running on the cloud! Dradis CE will be installed with some sample issues, and a Methodology and some Nodes with instructions designed to familiarize you with Dradis features and functionality.
