Issues
This page contains:
- Send a project Issue to the JIRA plugin
- Send multiple Issues to the JIRA plugin
- Assign the Issue to a JIRA project and send it to JIRA
Send a project Issue to the JIRA plugin
Have you already done the heavy lifting in your project? You've identified the Issues and probably generated a custom report as well. Now you can forward your Issues to Jira:
In your Project, open up on an Issue that you want to send to JIRA.
-
In the top right corner of the screen, click the dots menu, then Send to... and select JIRA from the dropdown
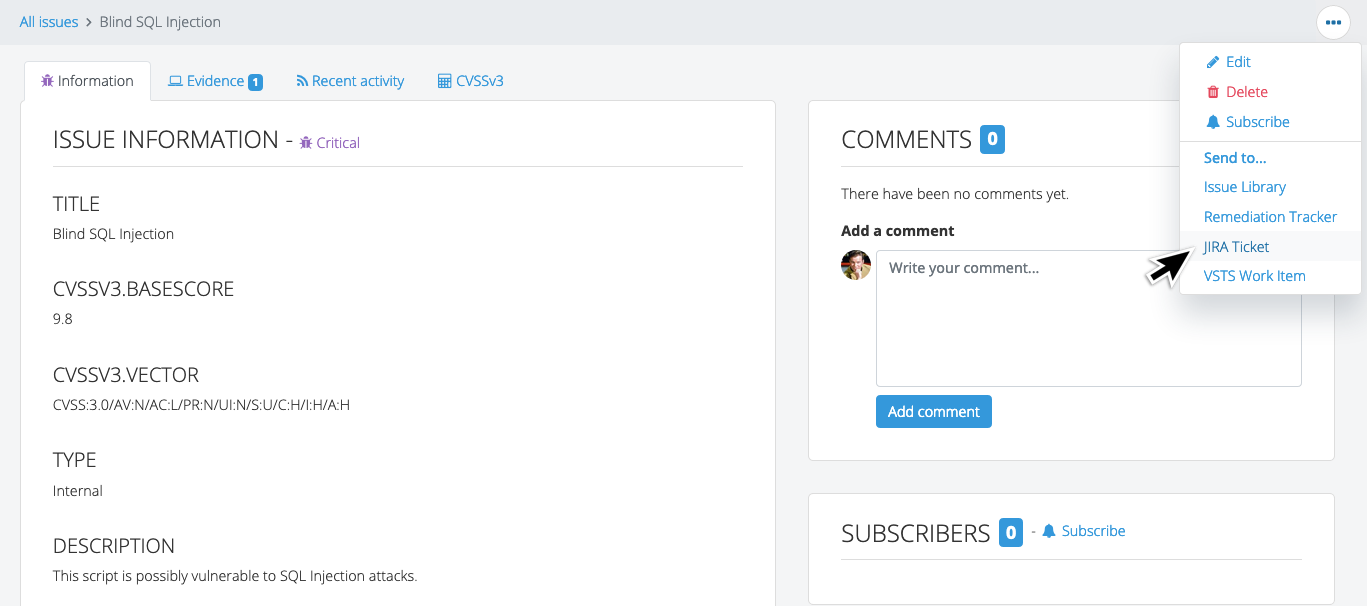
Continue by customizing the Issue content
Send multiple Issues to the JIRA plugin
Want to send several or all of your project's Issues to JIRA?
In your project, open the All Issues page
Select all of the Issues that you want to send to JIRA
In the toolbar, select Send to JIRA
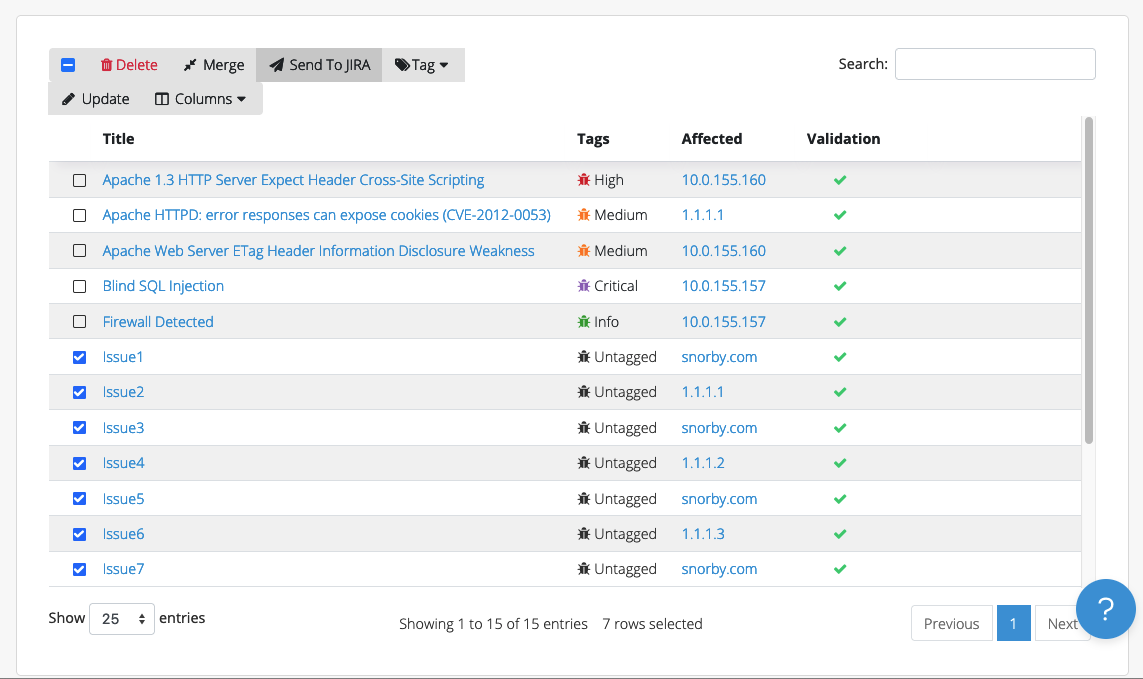
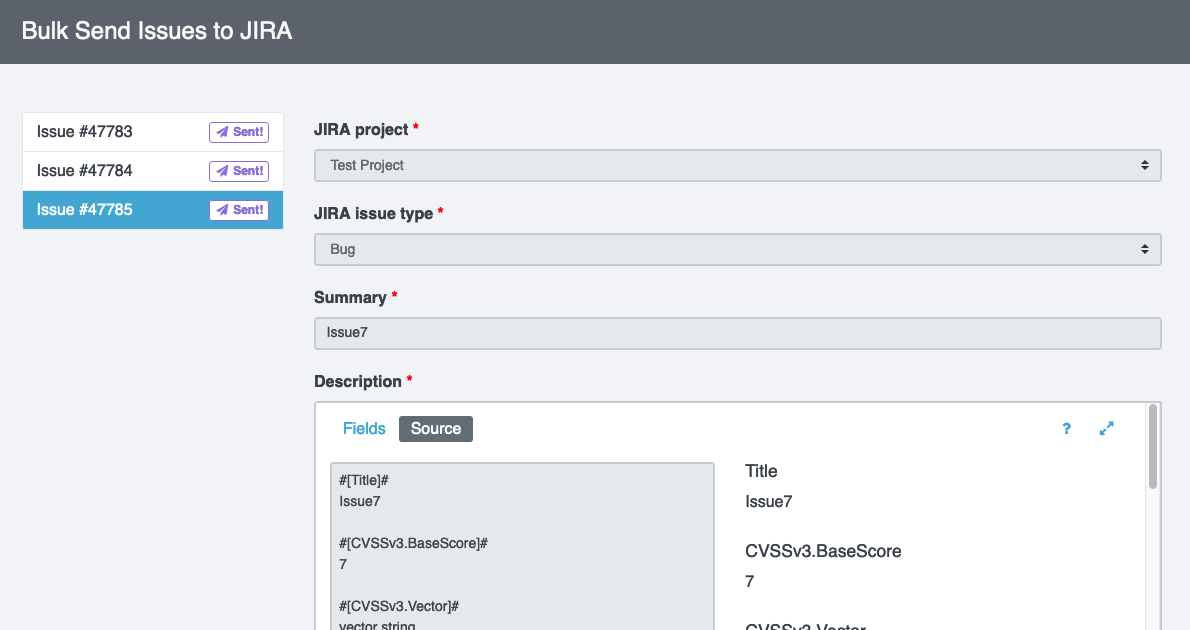
Continue by customizing each Issue's content and sending each to JIRA
Assign the Issue to a JIRA project and send it to JIRA
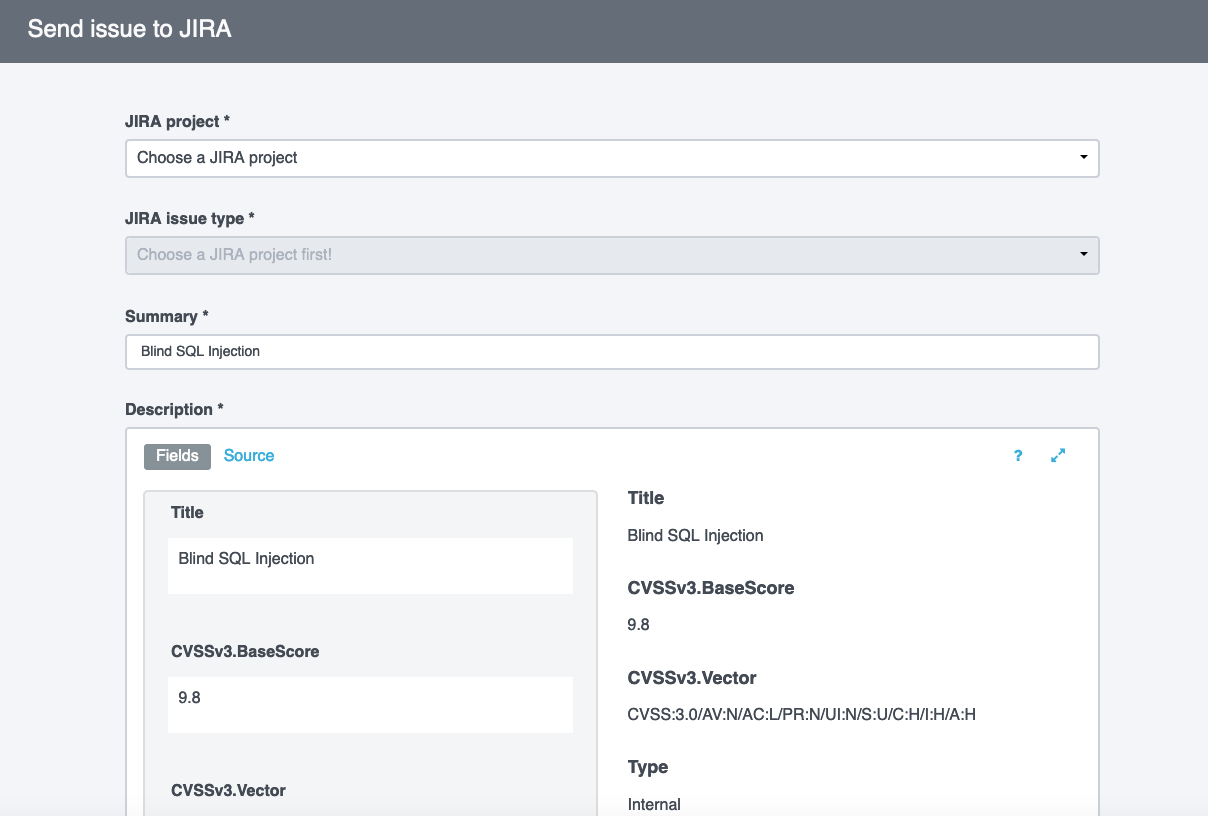
Use the dropdowns to assign the Issue to a JIRA Project and JIRA Issue Type.
The Summary and Description fields should already be filled out with the Issue details. Edit them if you like.
Once you have made your desired updates, click on the Send issue to JIRA button.
That's it! You've sent an Issue from your Dradis Project to JIRA. Now you can get to work on remediating it.
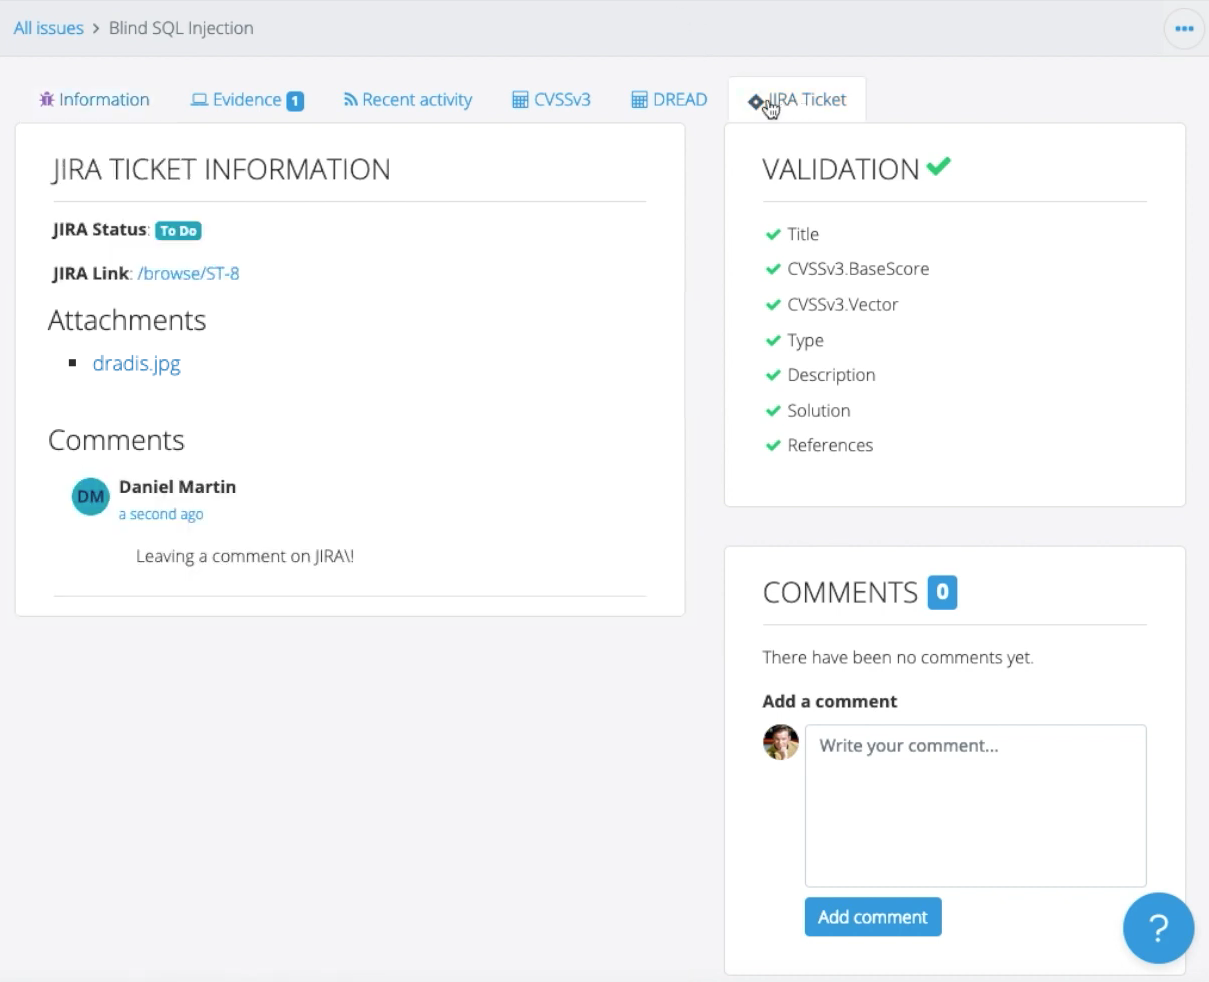
From now on, JIRA will also sync with this issue. A JIRA tab will be created on the Issue you sent to JIRA, and the tab will stay up-to-date with its associated JIRA ticket.
Next help article: Remediation Tracker tickets →