Author Archives: Daniel Martin

Software quality: creating a software product you can live with

When creating a software business there are a lot of things to consider and many decisions to be made. One of the most important ones, especially if you are by yourself, is: how high are you going to put the software quality bar?

Giving the day-to-day pressures to build up the business (do you have a business or do you just think you do?), the multiple feature requests by your users, the support requests you have to tend to, the pile of ideas you’ve got in the roadmap and the limited time in each day, it is clear that some compromises must be made. You’ve got to strike a balance between having enough features that your tool is compelling and making sure that what you have actually works (otherwise people that you worked so hard to convince of using your tool will be frustrated and abandon it).

In the early stages

Remember the classic essay by Joel Spolsky Good Software Takes Ten Years. Get Used To it, yes it takes time to create a great product, but you need to make sure that your company is going to survive long enough to get there and you need to make sure you’re still enjoying what you are doing years down the line 🙂

During the early stages, not every feature we’ve pushed in a release of Dradis Pro was as polished as I’d have liked, but at the time we thought it was the right choice: push the feature out and let our users start benefiting from it. However we’re not in the early stages any more. We’ve been two years in business, with a growing client base and heathy amount of new sign ups every month. Now it’s the time to take two steps back and look at the big picture, to prepare ourselves for the next ten years.

One of the most important things to learn and keep in mind, even more important to those of us coming from an engineering background is that your users don’t care about your product. They don’t want to use your product for the shake of using a product. They want the results they’ll get from using your product, that’s where the focus should be. Let me repeat that again as it is quite important:

Your users don’t want to use your product,
    they want the results they’ll get from using your product.

This means you have to identify what this end results are and focus your efforts in making it ever easier for your users to get there. This often means spending time refining areas of your tool instead of adding new features.

Balancing scope and software quality

In the era of the Lean Startup, the above ties nicely with the concept of minimum viable product: in order to become sustainable, you need to identify several key pieces of functionality that when put together are going to allow your users to get the end results they are looking for. [Note that I’m talking about being sustainable (i.e. generating enough revenue to reinvest in the product to improve it), not just in order to sell or in order to find users for your product. You can sell almost any piece of broken software for a low enough price. But that’s a different discussion for a different time.]

Throwing together those pieces and making sure that they can be made to work together as a coherent application is the very first stage in the lifecycle of the product. This means you’re solving a real problem, for real people, that will pay real money to get their problem solved. However, in the path to this first summit in your journey, you may have to release half-baked solutions or quirky code you are not proud of. You may even do this without being conscious about it (at the end of the day, you’re fighting an uphill battle, and getting results is the only think that counts on a daily basis).

There is a tipping point where you realize that the strategy of knocking together functionality and releasing it is not going to work in the long run. You are accruing too much technical debt. If you are hoping to be developing and maintaining your tool for years to come, you better make sure that you are creating something that you will want to maintain, something that you are proud of.

I saw the light while reading the Designing Web Applications book by Nathan Barry a few months ago. In particular a section discussing the ideas of Ryan Singer, Software designer at 37signals, on product quality:

I like to visualize software. Here’s an intuition that works for me. Feature complexity is like surface area and quality of execution is like height.

A hand-drawn representation of a software product like a surface, with different areas dotted in it and the height of the shape representing the qulity.

I want a base level of quality execution across all features. Whenever I commit to building or expanding a feature, I’m committing to a baseline of effort on the user experience. That way feature complexity — scope — is always the cost multiplier, not user experience. There aren’t debates about experience or how far to take it. The user experience simply has to be up to base standard in order to ship, no matter how trimmed down the feature is.

(Ryan has an article on his blog about the subject: What happens to user experience in a minimum viable product?)

Even though conceptually we’d all agree that it’s desirable to build good quality products, Ryan’s surface/heigh metaphor makes it really easy to understand the end goal we’re striving for and the reasoning behind it. It is a great tool that you can keep on the back of your head and use to drive your development efforts on a daily basis.

Keep your focus

It’s more important to ensure a consistent height across all areas of the product than it is to expand the surface. In fact, it is a trade off, there is no expanding the surface if the heigh isn’t going to be kept consistent.

This helps in narrowing the focus of what you’re trying to build, less surface, more height, build something great. This isn’t new, and there are many ways to phrase this feeling, but I always remember Bill Crosby’s:

I don’t know the key to success, but the key to failure is trying to please everybody.

You product can’t be all things to all people. This is why you’ve seen a multitude of minimalist text editors thrive by focussing on what is important and nothing else (iA Writer, Writeroom, Byword…). Have the basics taken care of before thinking about adding new stuff. As Julie Zhuo, Director of Product Design at Facebook puts it, there is a tax associated with every new feature you introduce that you better understand.

Making this shift, this change of focus towards quality, clarity and purpose has benefits all around. It makes you proud of the work you do and it helps to ensure that you don’t have too many features that you can’t pay attention to.

This is where we are going for the next few releases of Dradis Pro: don’t expect a lot of growth in the surface, we’ll focus on pushing and levelling our height, always keeping an eye on the results our users want to realize.

I’d like to wrap this post with another quote about quality and building a software product, this time by Jason Fried also of 37 signals:

It better be good, because people are depending on it to be good

Upcoming in Dradis Pro v1.8: fine-grained project permissions

The next release of Dradis Pro will introduce a long standing feature request: fine-grained project permissions.

From now on, it will be possible to restrict who has access to what projects. We’ll evolve the interface over time but the basics are already here:

A screenshot showing the interface to assign project permissions

Users will only be presented with those projects they have access to in the **Project selection** view:

The Project selection window filters only those projects to which the user has access to

Of course administrators can access any project any time and reassign the permissions:

A screenshot showing the full list of projects for an administrative user

The implementation is almost there, just running the finishing touches. We are hoping to release in the next few days.

Our users have been pushing for project permissions for a while now. Among the use cases where having fine-grained project permissions is going to be a big win are:

  • Restrict access to project that require a specific level of clearance (e.g. government projects, department of defense, etc.).
  • Accommodate requirements by certain clients that only a specific set of pre-approved individuals is allowed to take part and manage their projects.
  • Limit the visibility of the breadth of clients and projects of external contractors or freelancers brought to the organization.
  • Limit the visibility of new joiners that are still in their probation period.

That is on the most pure permission == restriction front. However, having fine-grained project permissions is also going to allow us to do a number of interesting things:

  • Create dashboards in which a users can quickly review all the projects they have been involved in lately.
  • Create dashboards in which Technical Directors can quickly see a breakdown of projects for each team member.
  • Quickly identified who has been working with who, and how long ago (useful for 360-degree feedback and evaluation).

All in all, this is a big step forward in the right direction and while we would normally wait to have a handful of new features before producing a new release we think this is important (and useful) enough to warrant its own version of the tool.

More information

If you are not a Dradis Pro user yet, you can read more about painless 1-click reporting, merging tool output from your favorite tools into a single report and delivering consistent results with our tool. Get a license and start saving yourself some time today.

Follow the OSSTMM v3 methodology with Dradis

You can now follow the OSSTMM v3 (Open Source Security Testing Methodology Manual) in your projects. Today we’ve added a new bundle to our Extras section. Extras is where we post report templates, methodologies and checklists for our community to grab and use.

Not familiar with the OSSTMM yet? From their website:

The OSSTMM is about operational security. It is about knowing and measuring how well security works. This methodology will tell you if what you have does what you want it to do and not just what you were told it does.

What you get from utilizing OSSTMM is a deep understanding of the interconnectedness of things. The people, processes, systems, and software all have some type of relationship.

Included in the OSSTMM bundle

The bundle contains methodologies for all the areas covered by OSSTM:

  • Defining a security test
  • Data networks security testing
  • Human security testing
  • Physical security testing
  • Telecommunications security testing
  • Wireless security testing

Included in the bundle is also a project template with the basic project structure you can use to follow the OSSTMM guidance.

Get the OSSTMM v3 methodology bundle and follow the OSSTMM v3 from today.

New in Dradis Pro v1.7

Today we have pushed a new version of Dradis Professional Edition: Dradis Pro v1.7. This is the result of eight months of hard work, a bit longer than usual, but the release is packed with lots of handy improvements.

Here are some changes:

  • New Issue/Evidence architecture: read about why this is a big deal.
  • New all-in-one view (more below).
  • New “by host” and “by issue” reporting (more below).
  • New default project / report template: to make it easy for you to build on top of it.
  • New interface to import Issues from external sources.
  • New Qualys upload plugin.
  • Updated plugins
    • Burp upload
      • Generates Issue/Evidence
      • Is orders of magnitude faster.
      • Integrates with the Plugin Manager.
    • MediaWiki import is now compatible with versions 1.14 -> 1.21
    • Nessus upload generates Issue/Evidence
    • Nexpose upload generates Issue/Evidence
  • Updates and internal improvements:
    • Updated to Rails 3.2.13
    • Improved code block and table styling

All-in-one view

Notes, issues and attachments all in a single place:

A screenshot showing note contents, issues and attachments in one page

And an improved interface to import form external sources:

Screenshot f the new one-click importer

And of course, you also get Dradis’ Smart Refresh goodness:

More screenshots

“By host” and “By issue” reporting

We have discussed multiple times how providing a useful deliverable is part of what makes a pentest firm great. With this release of Dradis Pro we’re introducing even more flexibility to our reporting engine.

byhost-20

It is now possible to write an issue description once and associate it will multiple hosts. Then in your report you can either present each issue along with all the affected hosts (and associated evidence) or the other way round: a host-by-host summary where you least each host under scope along with all the issues that affect it.

byhost-09_small

This flexibility is what saves our users 2 hours of reporting time in every project.

Still not a Dradis Pro user?

These are some of the benefits you are missing out:

Read more about Dradis Pro’s time-saving features.

Writing a security report: the elements of a useful pentest deliverable

We have discussed that the security report produced at the end of the engagement is a key component in proving your worth to your current and future clients.

When crafting a pentest report not only you’ll have to think about what to include in the report (sections, contents, tables, stats) but you will also need to decide how to write it. Let’s review what it takes to create a useful pentest report.

We are not talking about the specifics or the differences in structure between the deliverable produced for different project types (e.g. VA vs. wifi vs. external infrastructure). We want to provide you with the high-level guiding principles that you can use to ensure that the final security report you produce and deliver to your clients is a useful one.

The recommendations in this piece are based on dozens of report templates that we’ve seen as part of our report customisation service for Dradis Pro as well as our experience in the industry.

The goal of the engagement

The security report produced after each engagement should have a clear goal. In turn, this goal needs to be aligned with the client’s high-level goals. In “Choosing an independent penetration testing firm” we saw how identifying the goals and requirements of an engagement is a real pain point for some clients but also an opportunity for the security firm to provide education and guidance to strengthen the partnership with their customers.

A typical goal as stated by the client could be: “our objective is to secure the information”. This can be a good starting point albeit somewhat naive in all except the most simple cases. These days systems are so complex that assessing the full environment is sometimes not realistically possible (due to time on budget constraints). A more concrete goal such as “make sure that traveller A can’t modify the itinerary or get access to traveler B’s information” would normally produce a better outcome.

However, for the sake of this post, let’s keep it simple and focus on the broader goal of “securing the information”. With that in mind, the goal of the security report needs to be to communicate the results of the test and provide the client with actionable advice they can use to achieve that goal. That’s right, we need to persuade our clients to act upon the results we provide them.

In order to help your client to meet their goals, the more you know about them and their internal structures and processes the better. Who commissioned the engagement? Why? Is there a hidden agenda? Familiarising yourself with their industry and domain-specific problems will also help to focus your efforts on the right places.

Finally, it is important to know the audience of the deliverable you are producing. This seems like an obvious statement, but there is more to it than meets the eye. Who do you think is going to be reading the report your firm has produced? Is this going to be limited to the developers building the solution (or the IT team managing the servers)? Unlikely. At the very least the development manager or the project lead for the environment will want to review the results. Depending on the size of the company, this person may not be as technical as the guys getting their hands dirty building the system. And maybe this person’s boss or their boss’ boss will be involved. If your results expose a risk that is big enough for the organisation, the report can go up the ladder, to the CSO, CTO or CEO.

One security report, multiple audiences

At the very least it is clear that we could have multiple audiences with different technical profiles taking an interest in your report. If there is a chance that your deliverable will end up making the rounds internally (and the truth is that this is always a possibility), the wrong approach to take is to either produce a completely technical document full of nitty-gritty details or, going to the other end of the spectrum, delivering a high-level overview with the summary of the highlights of the test apt for consumption by C-level execs but lacking on technical depth.

The easiest way to find the middle ground and provide a useful document for both the technically inclined and also to the business types among your readers is to clearly split the document into sections. Make these sections as independent and self-contained as possible. I like to imagine that different people in the audience will open the document and delete the section they are not interested in and they will still get their money’s worth of value on what remains.

Problems you don’t want to deal with

Before delving into what to include and how to structure it, there are two problems you don’t want to deal with during the reporting phase of the project: collation and coverage.

Collation

It is still quite common that a sizable amount of the reporting time allocated during a test is spent collating results from different team members.

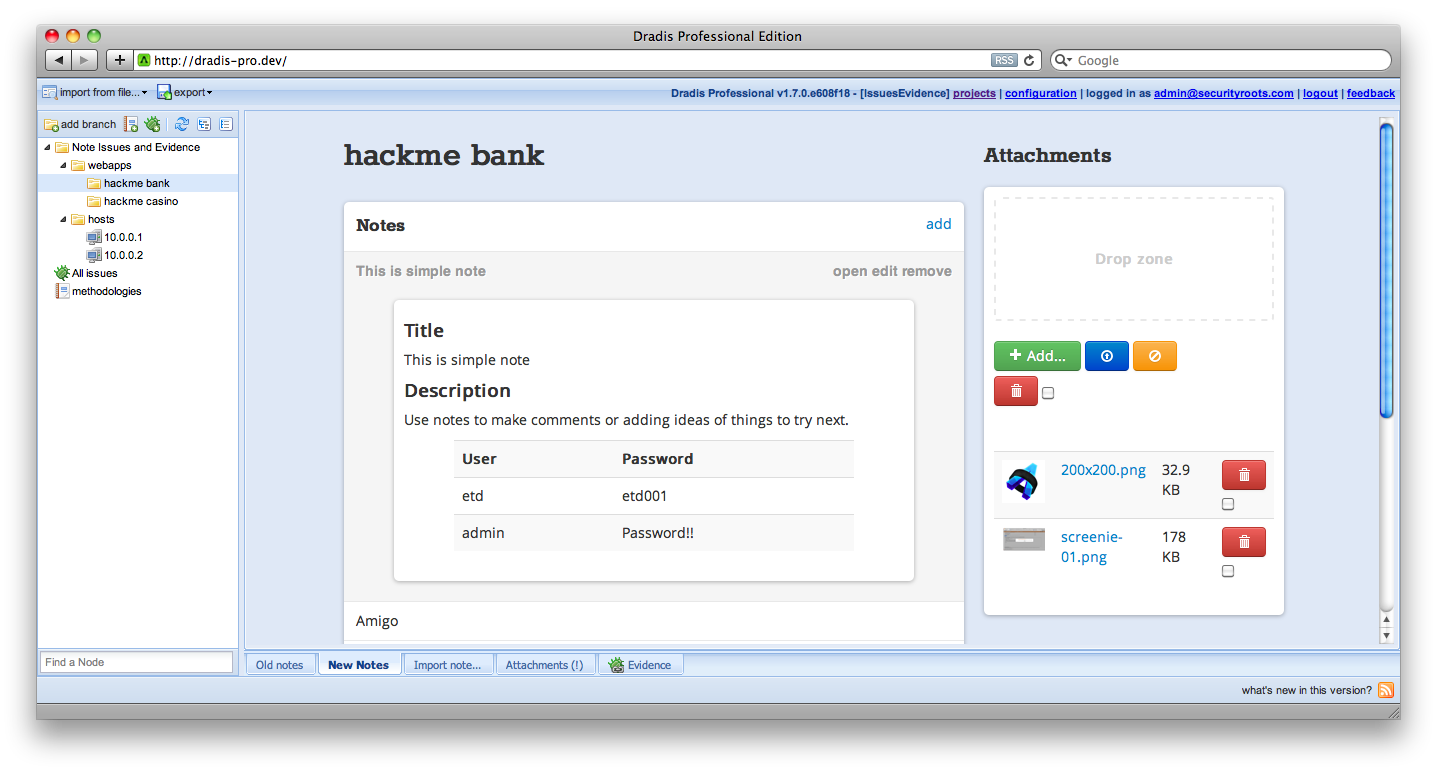
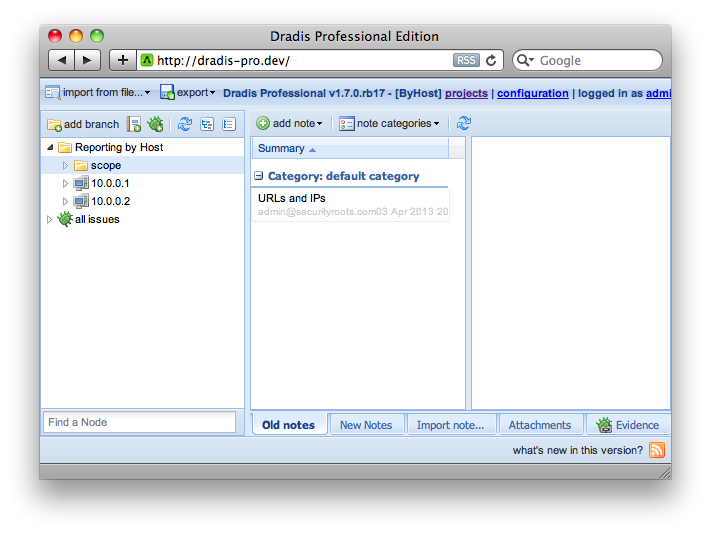
As we saw in the “Why being on the same page matters?” post, there are steps you can take to minimise the amount of collation work needed such as the use of a collaboration tool during the engagement.

Reporting time shouldn’t be collation time. All information must be available to the report writer before the reporting time begins. And it must be available in a format that can be directly used in the report. If your processes currently don’t make this possible, please consider reviewing them as the benefits of having all the information promptly available to the report writer definitely outweigh the drawbacks involved in updating those processes.

Coverage

How good was the coverage attained during the testing phase of the engagement? Was no stone left unturned? Do you have both evidence of the issues you uncovered and proof of the areas that were tested but were implemented securely and thus didn’t yield any findings? If not, the task of writing the final report is going to be a challenging one.

We have already discussed how using testing methodologies can improve your consistency and maximise your coverage raising the quality bar across your projects. Following a standard methodology will ensure that you’d have gathered all the evidence you need to provide a solid picture of your work in the final deliverable. Otherwise, the temptation of going down the rabbit hole, chasing a bug that may or may not be there may become too strong. We’ve all been there, and there is nothing wrong with it, as long as it doesn’t consume too much time and enough time is left to cover all the areas of the assignment. If you fail to balance your efforts across the attack surface, this will be reflected in the report (i.e. you won’t be able to discuss the areas you didn’t cover) and it will reflect badly on your and your firms’ ability to meet your client’s expectations.

Security report sections

For the rest of this post, we will assume that you have been using a collaboration tool and are following a testing methodology during the testing phase and as a result, you’ve got all the results you need and have attained full coverage of the items under the scope of the engagement.

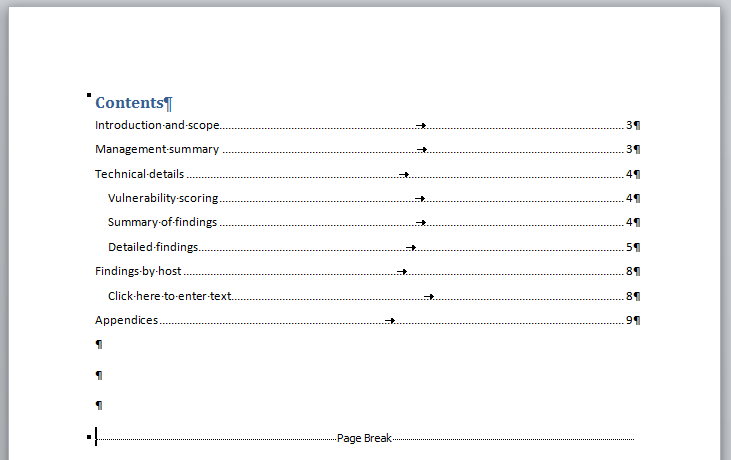
The goal of this post is not to provide a blow-by-blow breakdown of all the possible sections and structure you need to provide, there are some comprehensive resources on the net that go beyond what we could accomplish here (see Reporting – PTES or Writing a Penetration Testing Report). We want to focus on the overall structure and the reasons behind it as well as the approach and philosophy to follow when crafting the report to ensure you are producing a useful deliverable. At a very high level, the report content must be split between:

  • Executive summary
  • Technical details
  • Appendices

Executive summary

This is the most important section of the report and it is important not to kid ourselves into thinking otherwise. The project was commissioned not because an inherent desire to produce a technically secure environment but because there was a business need driving it. Call it risk management or strategy or marketing, it doesn’t matter. The business decided that a security review was necessary and our duty is to provide the business with a valuable summary.

The exec summary is probably the section that will be read by every single person going through the report, it is important to keep that in mind and to make sure that it is worded in a language that doesn’t require a lot of technical expertise to understand. Avoid talking about specific vulnerabilities (e.g. don’t mention cross-site request forgery) and focus on the impact these vulnerabilities have on the environment or its users. The fact that they are vulnerable to X is meaningless unless you also answer the question “so what?” and explain why they should care, why it is a bad thing and why they should be looking into mitigating the issue. As Guila says in the article, why give a presentation at all if you are not attempting to change the audience’s behaviors or attitudes?. And the security report is most definitely a presentation of your results to your client.

Don’t settle for just throwing in a bunch of low-end issues to the conclusions (e.g. “HTTPs content cached” or “ICMP timestamps enabled”) just to show that you uncovered something. If the environment was relatively secure and only low-impact findings were identified, just say so, your client will appreciate it.

Frame the discussion around the integrity, confidentiality, and availability of data stored, processed and transmitted by the application. Just covering the combination of these 6 concepts should give you more than enough content to create a decent summary (protip: meet the McCumber cube).

Apart from the project’s conclusions and recommendations, it is important that this section contains information about the scope of the test and that it highlights any caveats that arose during the engagement. Again this is to correctly frame the discussion and give the readers that may not be as familiar with the particular environment (e.g. CSO) the appropriate context.

In addition, it offers you protection should the client decide to challenge your results, approach or coverage attained. If a host or a given type of attack was requested by the client to be out of scope, this needs to be clearly stated. Along the same lines, if there were important issues affecting the delivery (e.g. the environment was offline for 12 hours) these have to be reflected. There is no need to go overboard on this either, if the application was offline for half an hour on the first day out of a five-day test and you don’t think this had an impact (e.g. you were able to do something else during that time or managed to attain full coverage throughout the rest of the test), there is no point in reflecting it on the report.
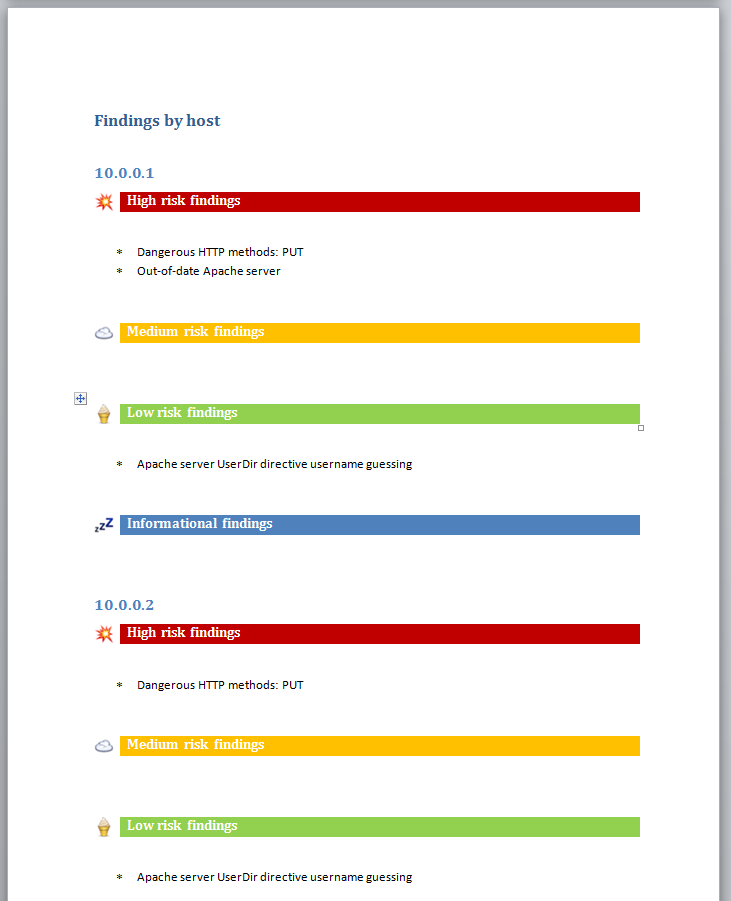
Technical details

This is the area that should be easier to craft from the tester’s perspective. There is not much to add here other than trying to keep your entries relevant to the current project. For instance, don’t include any MSDN references explaining how to do X in .NET when the application is written in Java. Or don’t link to the Apache site if all servers are using IIS.

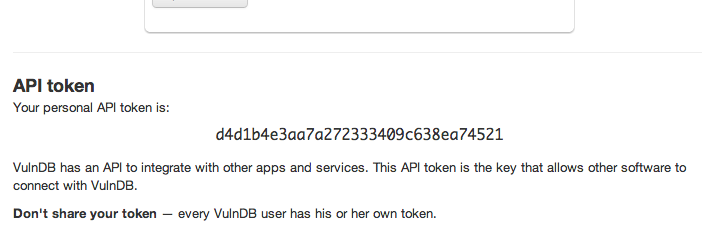
I don’t want to get into the scoring system for the vulnerabilities because that could add a few thousand words to the post, just pick a system that works for you and your clients and try to be consistent. This is where having a report entry management system in place (*cough*, like VulnDB) can help maintain consistency of language and rating across projects and clients, especially for larger teams.

A final note on what to include on each finding: think about the re-test. If six months down the line, the client comes back and requests a re-test, would any of your colleagues be able to reproduce your findings using exclusively the information you have provided in the report? You may be on holiday or otherwise unavailable during the re-test. Have you provided enough information in the first place? Non-obvious things that usually trip you over are details about the user role you were logged in as when you found the issue or remembering to include the series of steps you followed from the login form to the POST request that exposed the issue. Certain issues will only be triggered if the right combination of events and steps is performed. Documenting the last step in the process doesn’t usually provide a solid enough base for a re-test.

Finally, remember that the purpose of the document is not to show how smart you are or how many SQLi techniques you used. Everything needs to be weighed and measured against the engagement goals and the business impact to the client. For instance, an unglamourous absence of account lockouts in the client’s public facing webapp is likely to have a bigger impact for their business and users than a technically brilliant hack that combined path traversal, command execution and SQLi in backend admin interface only reachable by IT administrators over a secure VPN link.

Appendices

The Appendices should contain the information that while not key to understand the results of the assessment would be useful for someone trying to gain a better insight into the process followed and the results obtained.

An often overlooked property of the Appendixes section is that it provides a window to the internal processes followed by the testing team in particular and the security firm in general. Putting a bit of effort into structuring this section and providing a more transparent view of those processes would help to increase the transparency of your operations and thus the trust your clients can place on you. The more you let them see what is going on behind the curtain the more they’ll be able to trust you, your team and your judgment.

In the majority of the cases, this additional or supporting information is limited to scan results or a hodgepodge of tool output. This is fine as it will help during the mitigation and re-test phases but there are other useful pieces of information that can be included. For instance, a breakdown of the methodology used by the team is something that you don’t see that often. I’m not talking about a boilerplate methodology blob (i.e. ‘this is what we normally do on infrastructure assessments’), but a real breakdown of the different areas assessed during this particular engagement along with the evidence gathered for each task in the list to either provide assurance about its security or reveal a flaw. This will show that your firm is not only able to talk the talk during the sales and pre-engagement phases but that your team, on a project-by-project basis, are walking the walk and following all the steps in the methodology. Providing your clients with this level of assurance is going to automatically set you ahead of the pack because not a lot of firms are capable (or willing) to do so.

tl; dr;

Understanding the project goals, realising that the security report you are crafting will have multiple audiences of different technical expertise, making sure that the deliverable reflects not only the issues uncovered but also documents the coverage attained and the process involved in doing so will go a long way towards producing a useful pentest deliverable. Couple that with enough technical information to provide the project team with sufficient knowledge on the issues uncovered, the best mitigations to apply and a means to verify their reviewed implementation and you will have succeeded in your role of trusted security advisor.

VulnDB API update + new VulnDB Help site

We have improved VulnDB API and have a new (and better) Help site. Read on to find out more about these changes.

VulnDB HQ is a tool to manage your vulnerability descriptions so you can reuse them across reports. It also lets you create and share testing methodologies so every project is delivered to the same high quality standard.

The VulnDB logo

We have recently migrated the VulnDB Help site to a new location at:

http://vulndbhq.com/help/

Apart from the new look & feel (which we hope you like) we’ve made a few significant improvements in the API itself:

Strict SSL requirement

The API was accessible over plain-text HTTP due to a misconfiguration, we have completely disabled this.

Token-based authentication

Say your goodbyes to HTTP Basic authentication and welcome the new token-based authentication overlords.

Visit your Profile page to get your own API token which can be used to authenticate API request by means of a custom HTTP header.

A screenshot of the section of the Profile page showing the token

Lost your token or you suspect it was compromised? Want to deny access to your account to all 3rd party applications? Regenerate your token and you are good to go.

Better examples

We’ve improved the examples for each of the API methods with a proof-of-concept `curl` request along with the sample of any data that has to be submitted to the request. We also show response codes and content returned by the server so you know what to expect.

tl; dr;

Find answers to your VulnDB API questions at http://vulndbhq.com/help/

Note that we have not bumped the version number to introduce these changes. This is because the main interfaces, media formats, end points and data types have not changed.

Upcoming in Dradis Pro v1.7: Issues and Evidence

A new release of Dradis Pro is in the making: Dradis Pro v1.7. We continue to evolve our solution based of the feedback we receive from our users.

Starting in Dradis Pro v1.7 we have introduced two new concepts:

  • Issues: these are findings or vulnerabilities. An example would be: “Cross-site scripting“.
  • Evidence: this is where you provide the concrete information / proof-of-concept data for a given instance of the Issue.

For example:

  • The ‘Hackme bank’ application is vulnerable to Cross-site scripting (Issue). There are 7 instances of this issue and here is the information about them (Evidence).
  • The HTTP service in tcp/443 of the 10.0.0.1 host is affected by the Out-of-date Apache Tomcat issue and so is the tcp/8080 service in 10.0.0.2

As you can see, the main benefit of this approach is that you get to describe the Issue once and reuse that description.

To continue with our example, we’d have to create the following project structure:

Here we would add the Out-of-date Apache Tomcat Issue to the all issues node of the project, and then the Evidence for each host will be added in the corresponding node.

By segregating core vulnerability information from the evidence associated with each instance of the issue, we can start doing some powerful things.

Reporting by host, reporting by issue

On the one hand, some penetration testing firms like to structure their reports by finding. They go through the list of issues identified, providing description, mitigation advice, references, etc. and including all the hosts affected by the issue in each instance.

byhost-20

On the other hand, some prefer to structure their report by host. They list all the hosts in-scope for the engagement and describe each issue that affects them.

Of course there are others that provide these two options in the same report. A section where all the issues are described in detail followed by a host summary where you can quickly see a list of issues affecting a given host.

In order to provide this level of flexibility there needs to be a segregation between the issue details and the instance information.

With the introduction of Issues/Evidence in v1.7, we have just opened the door to all this flexibility.

More information

If you are an existing Dradis Pro user, you can already take advantage of all this features without having to wait until the release of v1.7. We have also prepared a step-by-step reporting guide for you:

Reporting by host, reporting by issue

If you are not a user yet, you can read more about cutting your reporting time, putting external tools to work for you (and not against you) and delivering consistent results with our tool. Get a license and start saving yourself some time today.

BSides London 2013 aftermath

BSides London took place last Wednesday the 24th on the Kensington and Chelsea Town Hall near High Street Kensington tube station in London.

I was really looking forward to this year’s edition as for the first time ever Dradis Pro was a sponsor in a security event. There are a lot of lessons learned on that front alone, but I’ll save them for another post.

It was a really long day. I only finished the slides for the Creating Custom Dradis Framework Plugins workshop around midnight the night before and I got to the venue by 8am to give the organisers a hand with the preparations. On the bright side, we had a really good turnout on the workshop:

BSides_London_2013_276

Creating Custom Dradis Framework plugins in action (more pics)

I think that the final head count was around 500 people both from around the country and from abroad. The downside is that we had to prepare around 500 tote bags with sponsor swag, the upside is that some sponsors provided some really nice goodies 😉

BSides swag by ScotSTS, 7Elements and Dradis Pro

The truth is that running an event such as BSides is a ton of work, and the team do it for free. And it doesn’t cost a penny to attend and you get a really nice free t-shirt:

BSides London t-shirt

I don’t think people thank the organisers enough. Thanks guys! To both the visible faces of the organisation but also to the rest of the conference goons that make all the little moving parts of the event tick.

As usual in this type of event, it’s easy to let yourself be distracted by the social side of things. I managed to finally catch up with a lot of Dradis Community contributors and Dradis Pro users. And hopefully meet a few future ones 😉 I finally put a face to some of the #dc4420 peeps and manage to catch up with some people that I no longer get to see that often.

It always baffles me that after working for a company for the last 5 years you get to meet some of your colleagues in a random security event instead of in the office or in an official company event. I guess that’s the nature of the industry we are on though. It was also good to catch up with ex-colleagues from previous lives.

Even though the scheduling gods decided I had to miss Marion & Rory’s workshop in the morning, I managed to get myself a WiFi Pineapple after Robin’s, just in time to rush to the main hall to catch the closing ceremony.

WiFi Pineapple kit

And before you realise it, the day was over and you are having a pint too many at the official BSides after-party…

Should you create your own back-office/collaboration tools?

When an organisation tries to tackle the “collaboration and automated reporting problem“, one of the early decisions to make is whether they should try to build a solution in-house or use an off-the-shelf collaboration tool.

Of course, this is not an easy decision to make and there are a lot of factors involved including:

  • Your firm’s size and resources
  • Cost (in-house != free)
  • The risks involved

But before we begin discussing these factors, it will be useful to get a quick overview what’s really involved in creating a software tool.

The challenge of building a software tool

What we are talking about here is building a solid back-office tool, something your business can rely on, not a quick Python script to parse Nmap output.

My background is in information security and electrical engineering, but I’ve written a lot of software, from small funny side projects, to successful open source tools and commercial products and services.

I’m neither a software engineering guru nor an expert in software development theory (I can point you in the right direction though), but building a software tool involves a few more steps than just “coding it”. For starters:

  • Capture requirements
  • Design the solution
  • Create a test plan
  • Develop
  • Document
  • Maintain
  • Improve
  • Support your users

The steps will vary a little depending on your choice of software development methodology, but you get the idea.

If one of the steps is missing the full thing falls apart. For instance, say someone forgets to ‘document’ a new tool. Whoever wants to use the tool and doesn’t have direct access to the developer (e.g. a new hire 8 months down the line) is stuck. Or if there is no way to track and manage feature requests and improvements, the tool will become outdated pretty quickly.

With this background on what it takes to successfully build a solid software tool, lets consider some of the factors that should play a role in deciding whether to go the in-house route or not.

Your firm’s size and resources

How many resources can your firm invest in this project? Google can put 100 top-notch developers to work on an in-house collaboration tool for a full quarter and the financial department won’t even notice.

If you are a small pentesting firm, chances are you don’t have much in terms of spare time to spend on pet projects. As the team grows, you may be able to work some gaps in the schedule and liberate a few resources though. This could work out. However, you have to consider that not only will you need to find the time to create the initial release of the tool but also you’ll need to be able to find the resources down the line to maintain, improve and support it. The alternative is to bring a small group of developers on payroll to churn back-office tools (I’ve seen some mid- and large-size security firms that successfully pulled this off). However this is a strategic decision which comes with a different set of risks (e.g. how will you keep your devs motivated? What about training/career development for them? Do you have enough back-end tools to write to justify the full salary of a developer every month?).

Along the same lines, if you’re part of the internal security team of an organisation that isn’t focussed on building software, chances are you’ll have plenty in your plate already without having to add software project management and delivery to it.

Cost (in-house != free)

There is often the misconception that because you’re building it in-house, you’re getting it for free. At the end of the day whoever is writing the tool is going to receive the same salary at the end of the month. If you get the tool built at the same time, that’s like printing your own money!

Except… it isn’t. The problem with this line of reasoning is the at the same time part. Most likely the author is being paid to perform a different job, something that’s revenue-generating and has an impact in the bottom line. If the author stops delivering this job, all that revenue never materialises.

Over the years, I’ve seen this scenario play out a few times:

Manager: How long is it going take?
Optimistic geek: X hours, Y days tops
Manager: Cool, do it!

What is missing from the picture is that it is not enough to set aside a few hours for “coding it”, you have to allocate the time for all the tasks involved in the process. And more often than not Maintaining and Improving are going to take the lion’s share of the resources required to successfully build the tool (protip: when in doubt estimating a project: sixtoeightweeks.com).

One of the tasks that really suffers when going the in-house route is Support: if something breaks in an unexpected way, who will fix it? Will this person be available when it breaks or there is a chance he’ll be on-site (or abroad) for a few weeks before the problem can be looked into?

Your firm’s revenue comes from your client work not from spending time and resources working on your back-end systems. The fact that you can find some time and resources to build the first release of a given tool, doesn’t mean that maintaining, supporting and improving your own back-end tools will make economic sense.

The risks of in-house development

There are a few risks involved in the in-house approach that should be considered. For instance, what happens when your in-house geek, the author of the tool, decides to move on and leaves the company? Can someone maintain and improve the old system or are you back to square one? All the time and resources invested up to that point can be lost if you don’t find a way to continue maintaining the tool.

Different developers have different styles and different preferences for development language, technology stack and even source code management system. Professional developers (those that work for a software vendor developing software as their main occupation) usually agree on a set of technologies and practices to be used for a given project, meaning that new people can be brought on board or leave the team seamlessly. Amateur developers (those that like building stuff but don’t do it as their main occupation) have the same preferences and biases as the pros and they are happy to go with them without giving them a second though as they don’t usually have to coordinate with others. Normally, they won’t invest enough time creating documentation or documenting the code because at the end of the day, they created it from scratch and know it inside out (of course 6 months down the line, they’ll think it sucks). Unfortunately this means that the process of handing over or taking ownership of a project created in this way will be a lot more complicated.

When building your own back-end systems you have to think: who is responsible for this tool? Another conversation I’ve seen a few times:

(the original in-house author of the tool just moved on to greener pastures)
Manager: Hey, you like coding, will you take responsibility for this?
Optimistic geek: Sure! But it’s Ruby, I’ll rewrite the entire thing from scratch in Python and we’ll be rolling in no time!
Manager: [sigh]

If you are part of a bigger organisation that can make the long-term strategic commitment to build and maintain the tool then go ahead. If you don’t have all those resources to spare and are relying on your consultants to build and maintain back-end tools, be aware of the risks involved.

Conclusion: why does the in-house approach not always work?

The in-house development cycle of doom:

  1. A requirement for a new back-office tools is identified
  2. An in-house geek is nominated for the task and knocks something together.
  3. A first version of the tool is deployed and people get on with their business.
  4. Time passes, tweaks are required, suggestions are made, but something else always has priority on the creator’s agenda.
  5. Maybe after a few months, management decides to invest a few days from the creator’s time to work on a new version.

As you can imagine, this process is unlikely to yield optimum results. If building software tools is not a core competency of your business, you may be better served by letting a software development specialist help you out. Let them take care of Maintaining, Improving and Supporting it for you while you focus on delivering value to your clients.

Of course the other side of this coin is that if you decide to use a third-party tool, whoever you end up choosing has to be worthy of your trust:

  • How long have they been in business?
  • How many clients are using their solutions?
  • How responsive is their support team?

These are just some of the highlights though, the topic is deep enough to warrant its own blog post.

tl; dr;

Going the in-house route may make sense for larger organisations with deeper pockets. They can either hire an internal development team (or outsource the work and have an internal project manager) or assign one or several in-house geeks to spend time creating and maintaing the tools. But remember: in-house != free.

Smaller teams and those starting up are usually better off with an off-the-shelf solution built by a solid vendor that is flexible and reliable. However, the solution needs to be easily extended/connected with other tools and systems to avoid any vendor lock-ins of your data.

Dradis Pro report templates and testing methodologies for download

Ever wanted to create your own Dradis Pro report templates but didn’t know where to start? Wait no more! A few days ago we introduced the Extras page. From there you can download report templates and testing methodologies. The idea is to showcase all the possibilities supported by our reporting engine and lay the ground work so our users can build on top of these templates.

The latest addition has been the OWASP Top 10 – 2013rc checklist. This covers the recently released OWASP Top 10 – 2013 release and contains 60 checks that you can use to test for all the issues in the new Top 10:

  • A1-Injection
  • A2–Broken Authentication and Session Management
  • A3–Cross-Site Scripting (XSS)
  • A4–Insecure Direct Object References
  • A5–Security Misconfiguration
  • A6–Sensitive Data Exposure
  • A7–Missing Function Level Access Control
  • A8-Cross-Site Request Forgery (CSRF)
  • A9-Using Components with Known Vulnerabilities
  • A10–Unvalidated Redirects and Forwards

Below is a list with a few examples of the Dradis Pro report templates (both Word and HTML) that you can find there:

Advanced Word example

Mix everything together: use Dradis notes for your conclusions, sort your findings by severity, filter, group, make use of document properties, etc.

Dradis Pro Advanced report template: a screenshot showing the advanced word report

A simple report to get you started

Never created a custom Dradis Pro report template before? No problem, start with this basic template to learn about the inner workings of the engine and in no time you’ll have your custom own report template up and running.

Dradis Pro Basic report template: a screenshot showing a detail of a table in the simple report template

A fancy HTML report

Dradis Pro supports a number of report formats including Word 2010 and HTML. In this case we show you how to create a fairly complex HTML report with the list of issues order by severity, a bit of JavaScript to auto-colour and auto-link external references and some awesome charts to nicely show the risk profile of the environment.

Dradis Pro HTML report template: a screenshot of the HTML report template showing a chart for all the issues

With the help of these samples, creating your own report template has never been easier. Are you ready to give Dradis Pro a try?